22 Stylish Bun with Bangs Hairstyles Worth Saving
There’s a reason this pairing keeps reappearing on red carpets and in salon feeds. A bun pulls every strand backward and upward, which is exactly what makes it look polished, and also exactly what can make it look severe. Bun with bangs hairstyles solve that problem in a single move. The fringe stays forward, framing the face, while everything else disappears into a clean shape behind it. You get the structure of an updo and the softness of loose hair at the same time.
Stylists have leaned into this hard over the past two years. Celebrity hairstylist Lucy Gedjeyan, owner of Lucy Luna Beauty Salon, notes that bangs have firmly returned and that the sheer number of variations means almost anyone can find a version that works. Celebrity hairstylist Dimitris Giannetos reports the same across every fringe type, from wispy to curtain to short French bangs. Meanwhile the updo itself has softened, with Nicole Petty, brand director at Milk & Blush, describing the current mood as intentional structure balanced with softness.
Twenty-two combinations follow, grouped by the type of bun underneath, since that’s usually the decision you make first.
Sleek Buns with Bangs
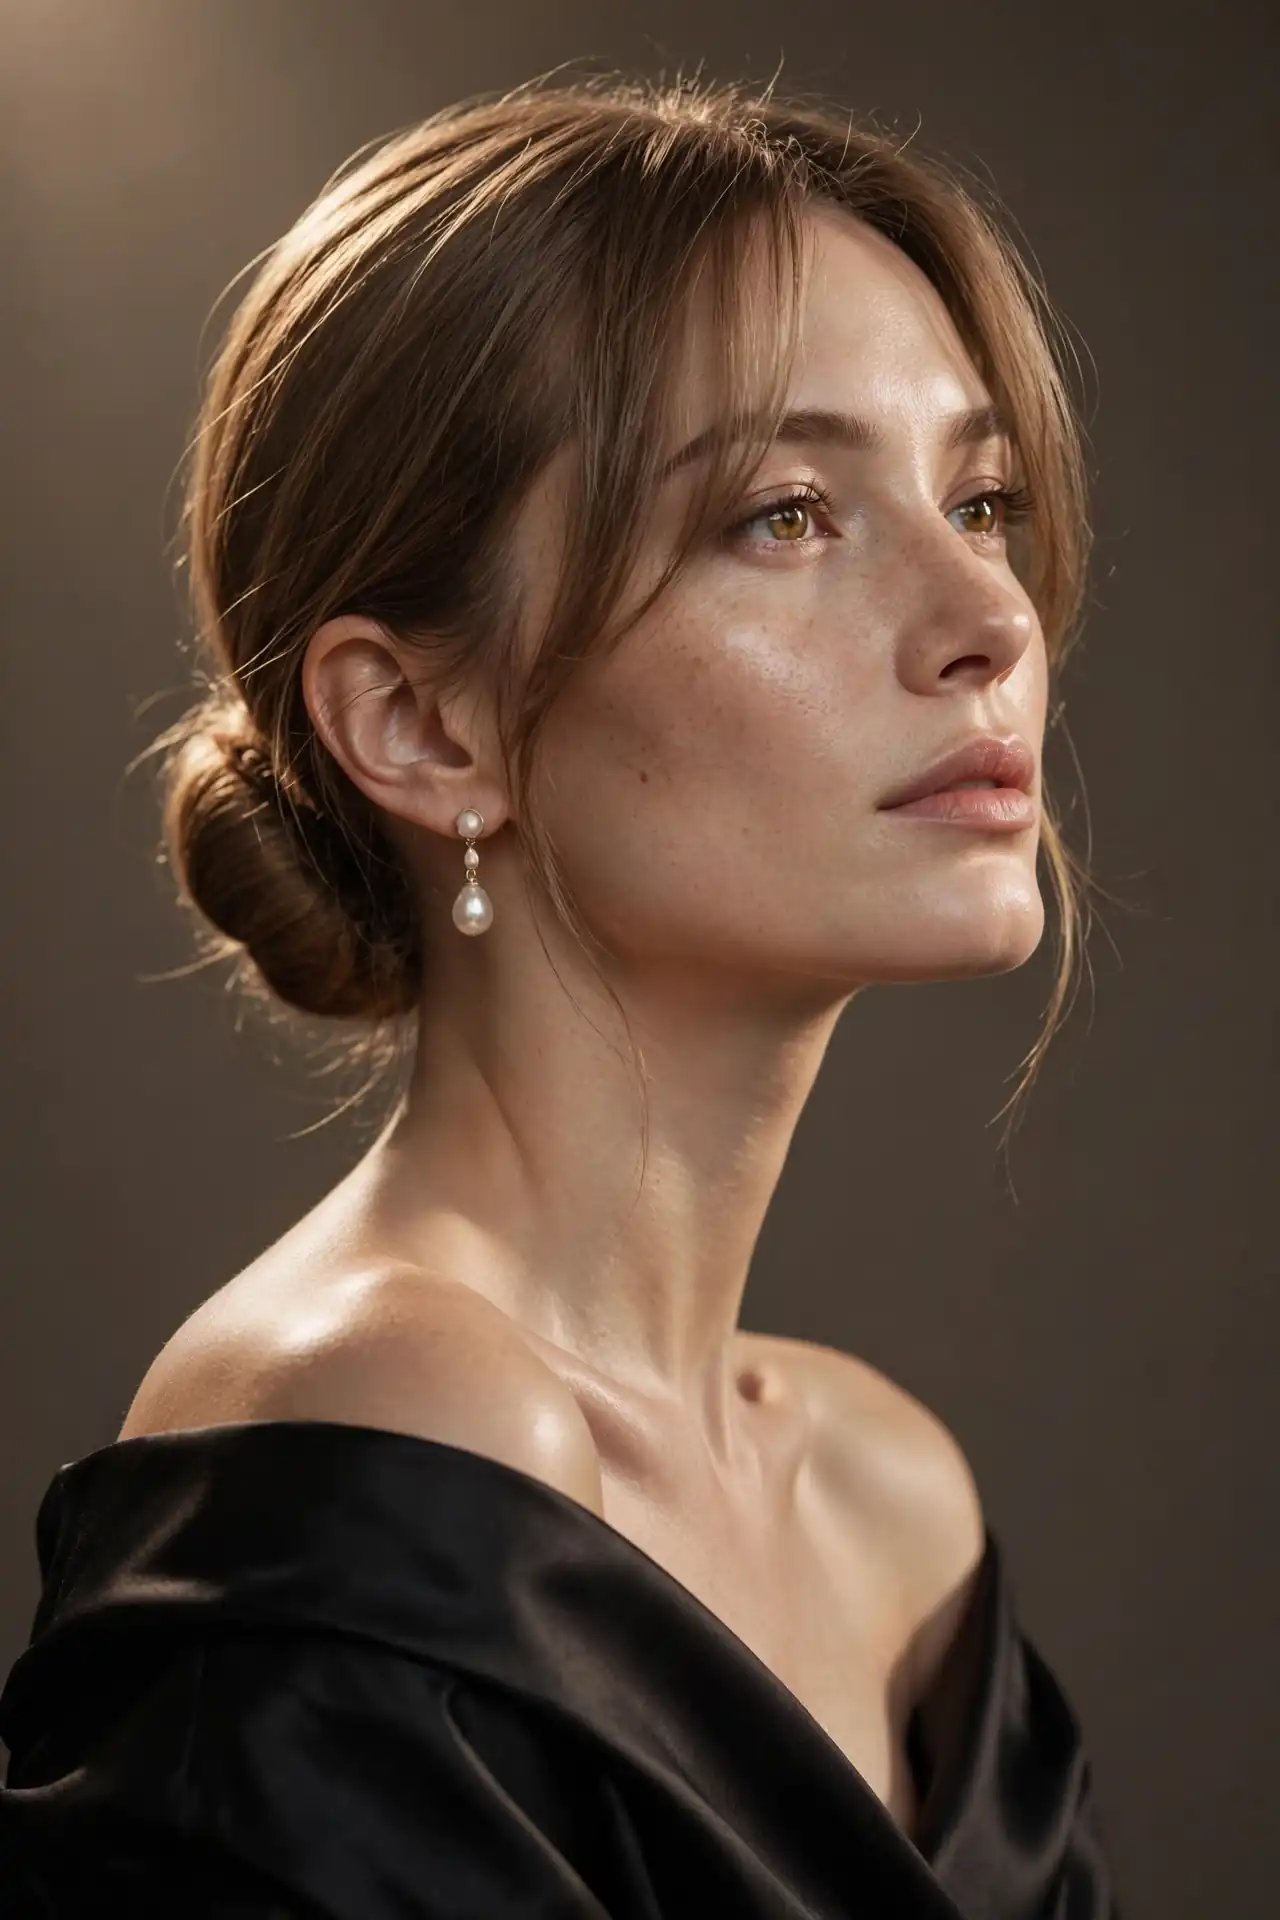
Precision at the back, softness at the front. This category reads professional, expensive and deliberate, and the fringe is doing the work that stops it feeling cold.
The Sleek Low Bun with Curtain Bangs
A smooth knot at the nape paired with a centre-parted fringe that skims the cheekbones is arguably the most wearable version of this entire pairing. The reason it works so consistently is geometric. Curtain bangs taper outward and downward toward the cheekbones, creating a soft inverted V shape that draws the eye inward and highlights bone structure. Behind that, the sleek bun removes all visual width from the sides of the head.
Because the bun sits low, the whole silhouette stays close to the head and elongates the neck. That combination suits offices, weddings, dinners and every situation in between. Apply a shine serum through the mid-lengths before you gather anything, since the smoothness of the bun is what the fringe is contrasting against. Two curved pieces at the front, not five, keeps it from tipping into messy territory.
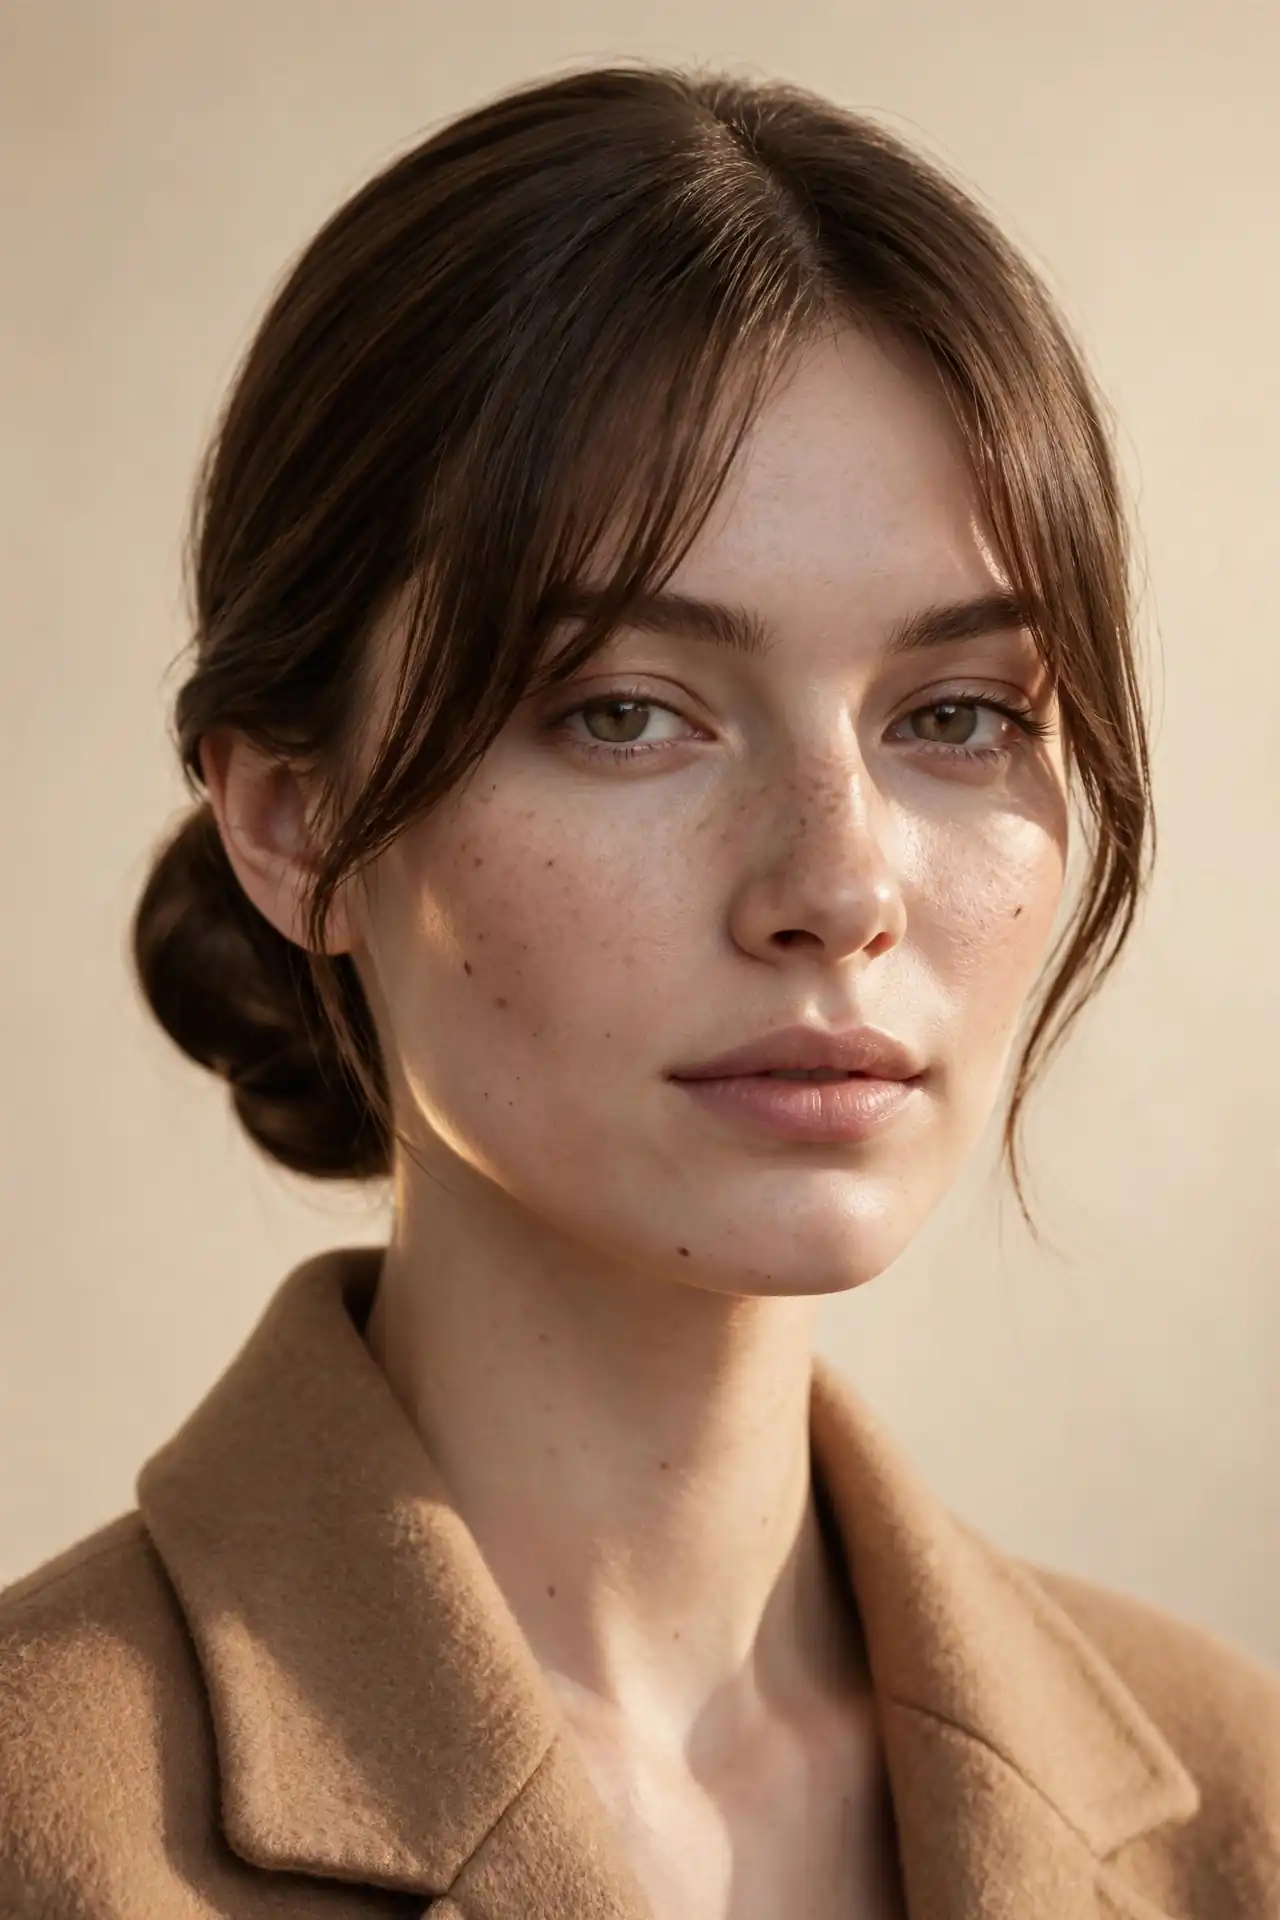
The Sleek Top Knot with Soft Curtain Bangs
Walk into any salon and ask for something that reads modern without being complicated, and this is roughly what you’ll get. Positioning the knot high on the crown lifts the entire face and elongates the neck, while the curtain fringe stops the lifted silhouette from looking severe. It’s a genuine balancing act, and the fringe is the counterweight. Medium length hair works best, since you need enough to wrap into a full knot without the ends escaping. Fine to medium hair types benefit noticeably because the height creates the appearance of density that fine hair often lacks.
Use a smoothing serum for shine and hold rather than a heavy gel, which can make the top knot look lacquered rather than sleek. Style the fringe before you gather, not after, and leave it slightly softer than the bun so the two elements read as intentional contrast.
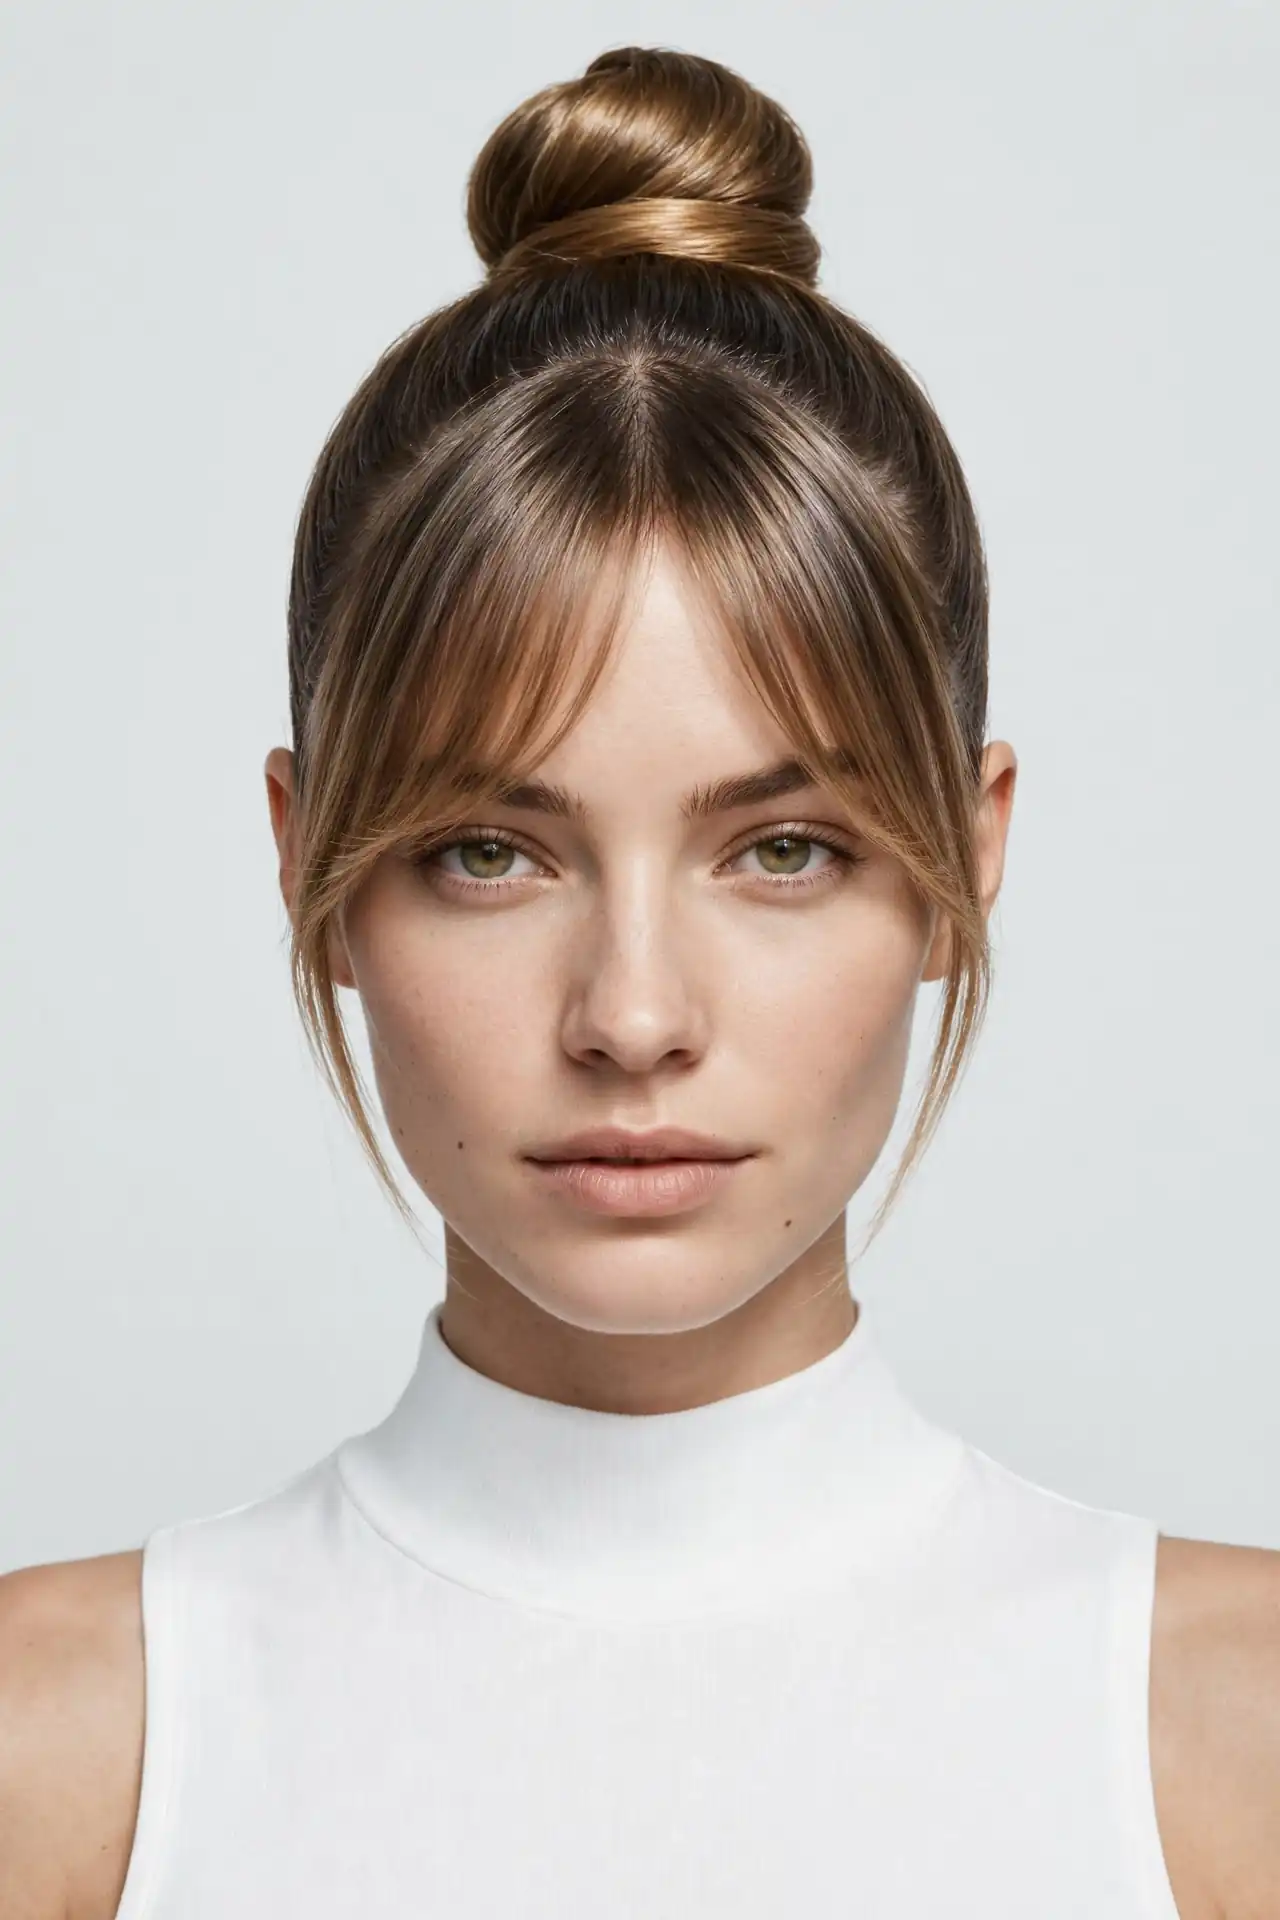
The Slicked-Back Low Bun with a Blunt Fringe
Can a slicked bun work with heavy bangs? It’s actually one of the sharpest combinations available, provided you commit fully to both. The contrast is the whole point. A gel-smoothed bun with no visible texture behind a dense, straight-across fringe creates two hard graphic elements sitting against each other. Nothing about it is accidental, which is precisely why it photographs so well. Thick, straight hair carries it best, since a blunt fringe needs genuine density to hold its line and a slicked bun needs enough length to disappear cleanly.
One practical caution worth knowing: hairspray and gel drift. Whatever product you use on the slicked sections will find its way onto your fringe if you’re not careful, and a blunt fringe with product residue goes stringy within an hour. Hold a comb or your hand as a shield along the hairline while you spray.
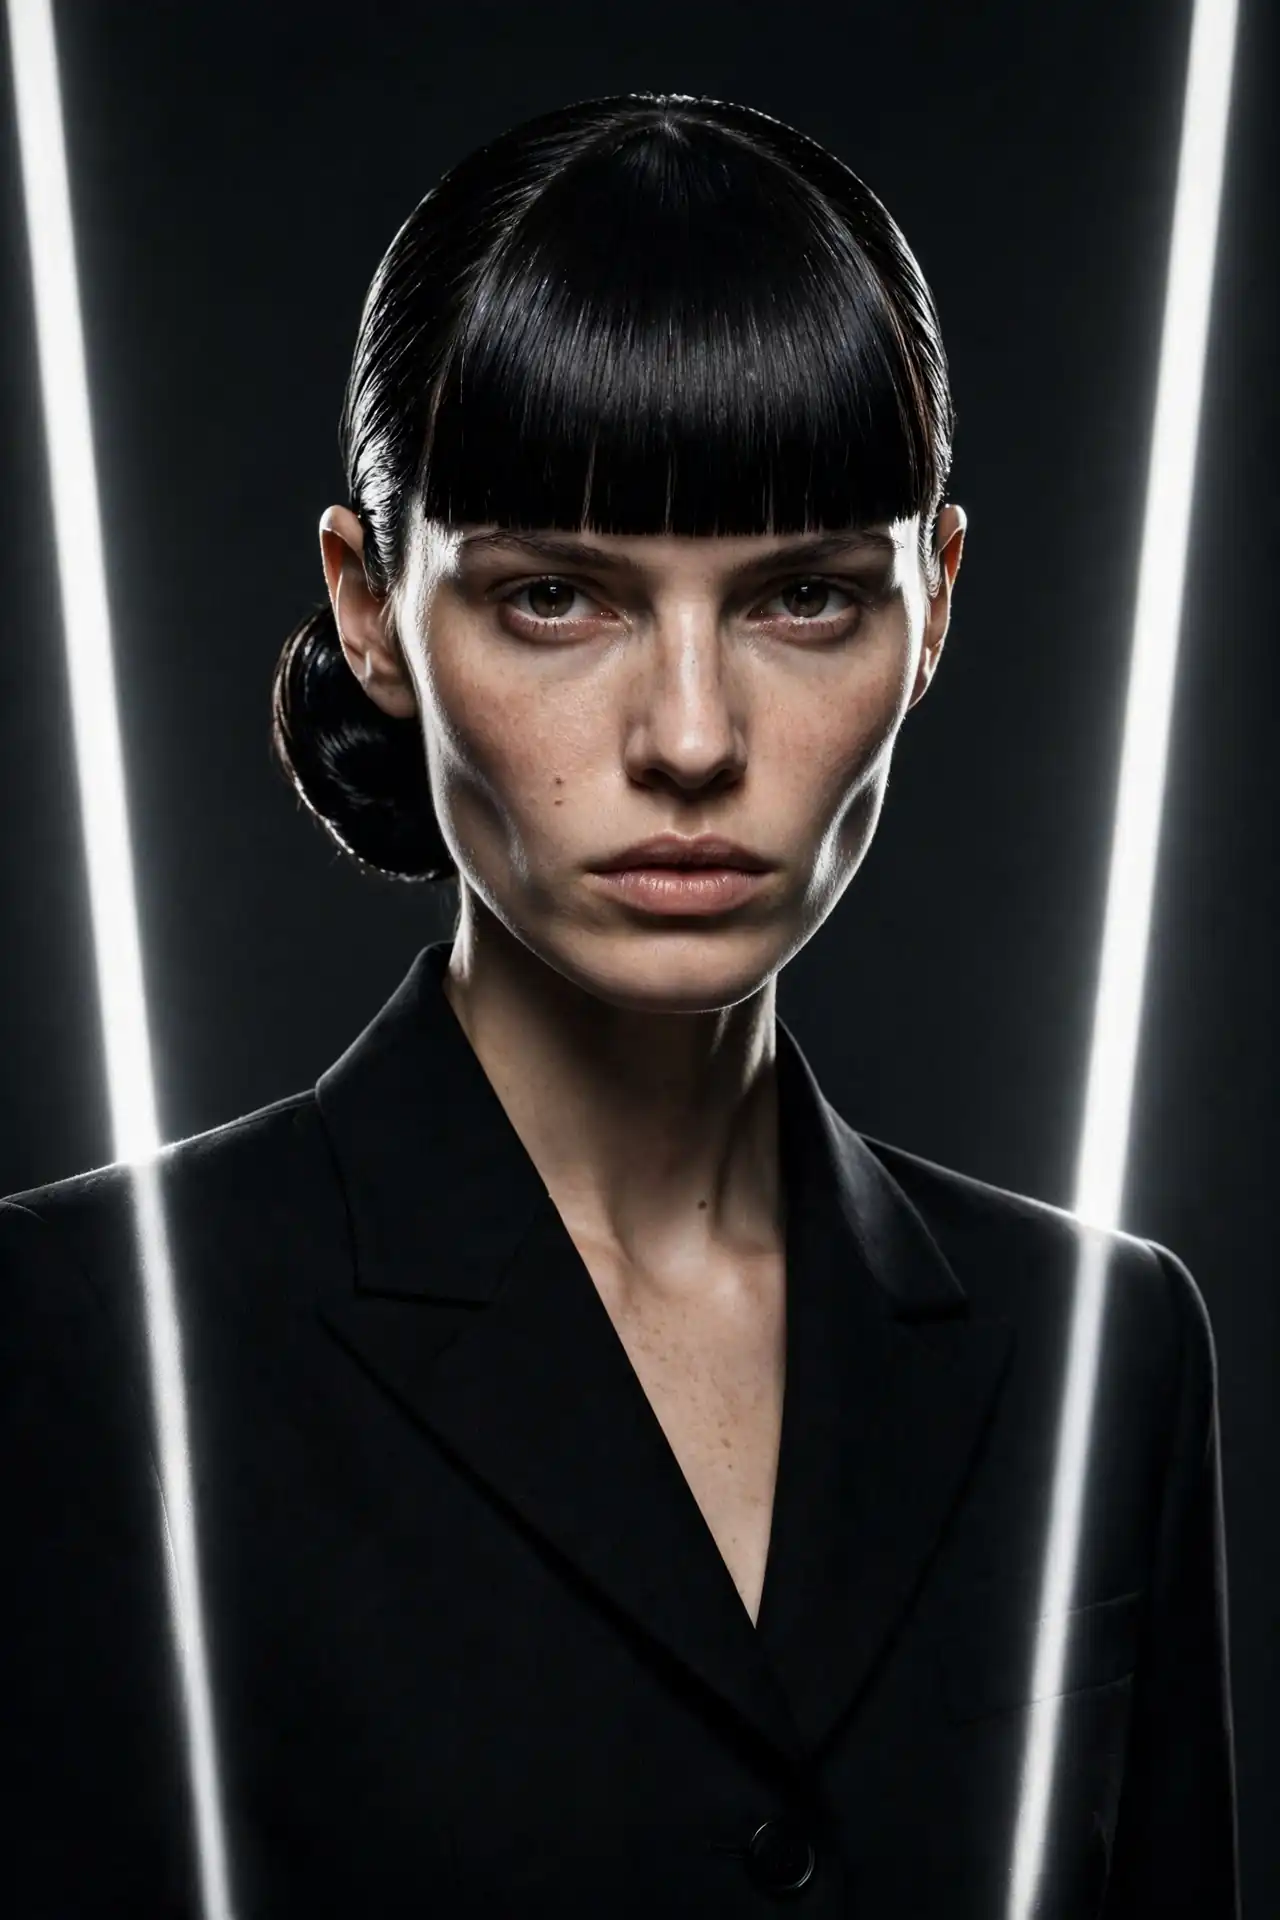
The Ballerina Bun with Wispy Bangs
Six minutes. That’s roughly what this takes once you’ve done it twice, and most of that is the brushing. A high, tightly gathered bun needs real tension to hold, which is why it suits thick hair better than fine. What wispy bangs add is breathing room. Sheila Guillermo, stylist at NYC The Team, describes the effect of a wispy fringe well: delicate, airy pieces that softly frame the eyes and melt into the shape rather than sitting apart from it. Against a bun this structured, that softness is essential.
There’s a technical issue specific to this pairing though. Pulling hair back tightly also pulls on the roots at your hairline, which can lift a short fringe and make it separate into pieces. Gather slightly looser at the front than you think you need, or leave a deliberate half-inch of slack before you secure the elastic.
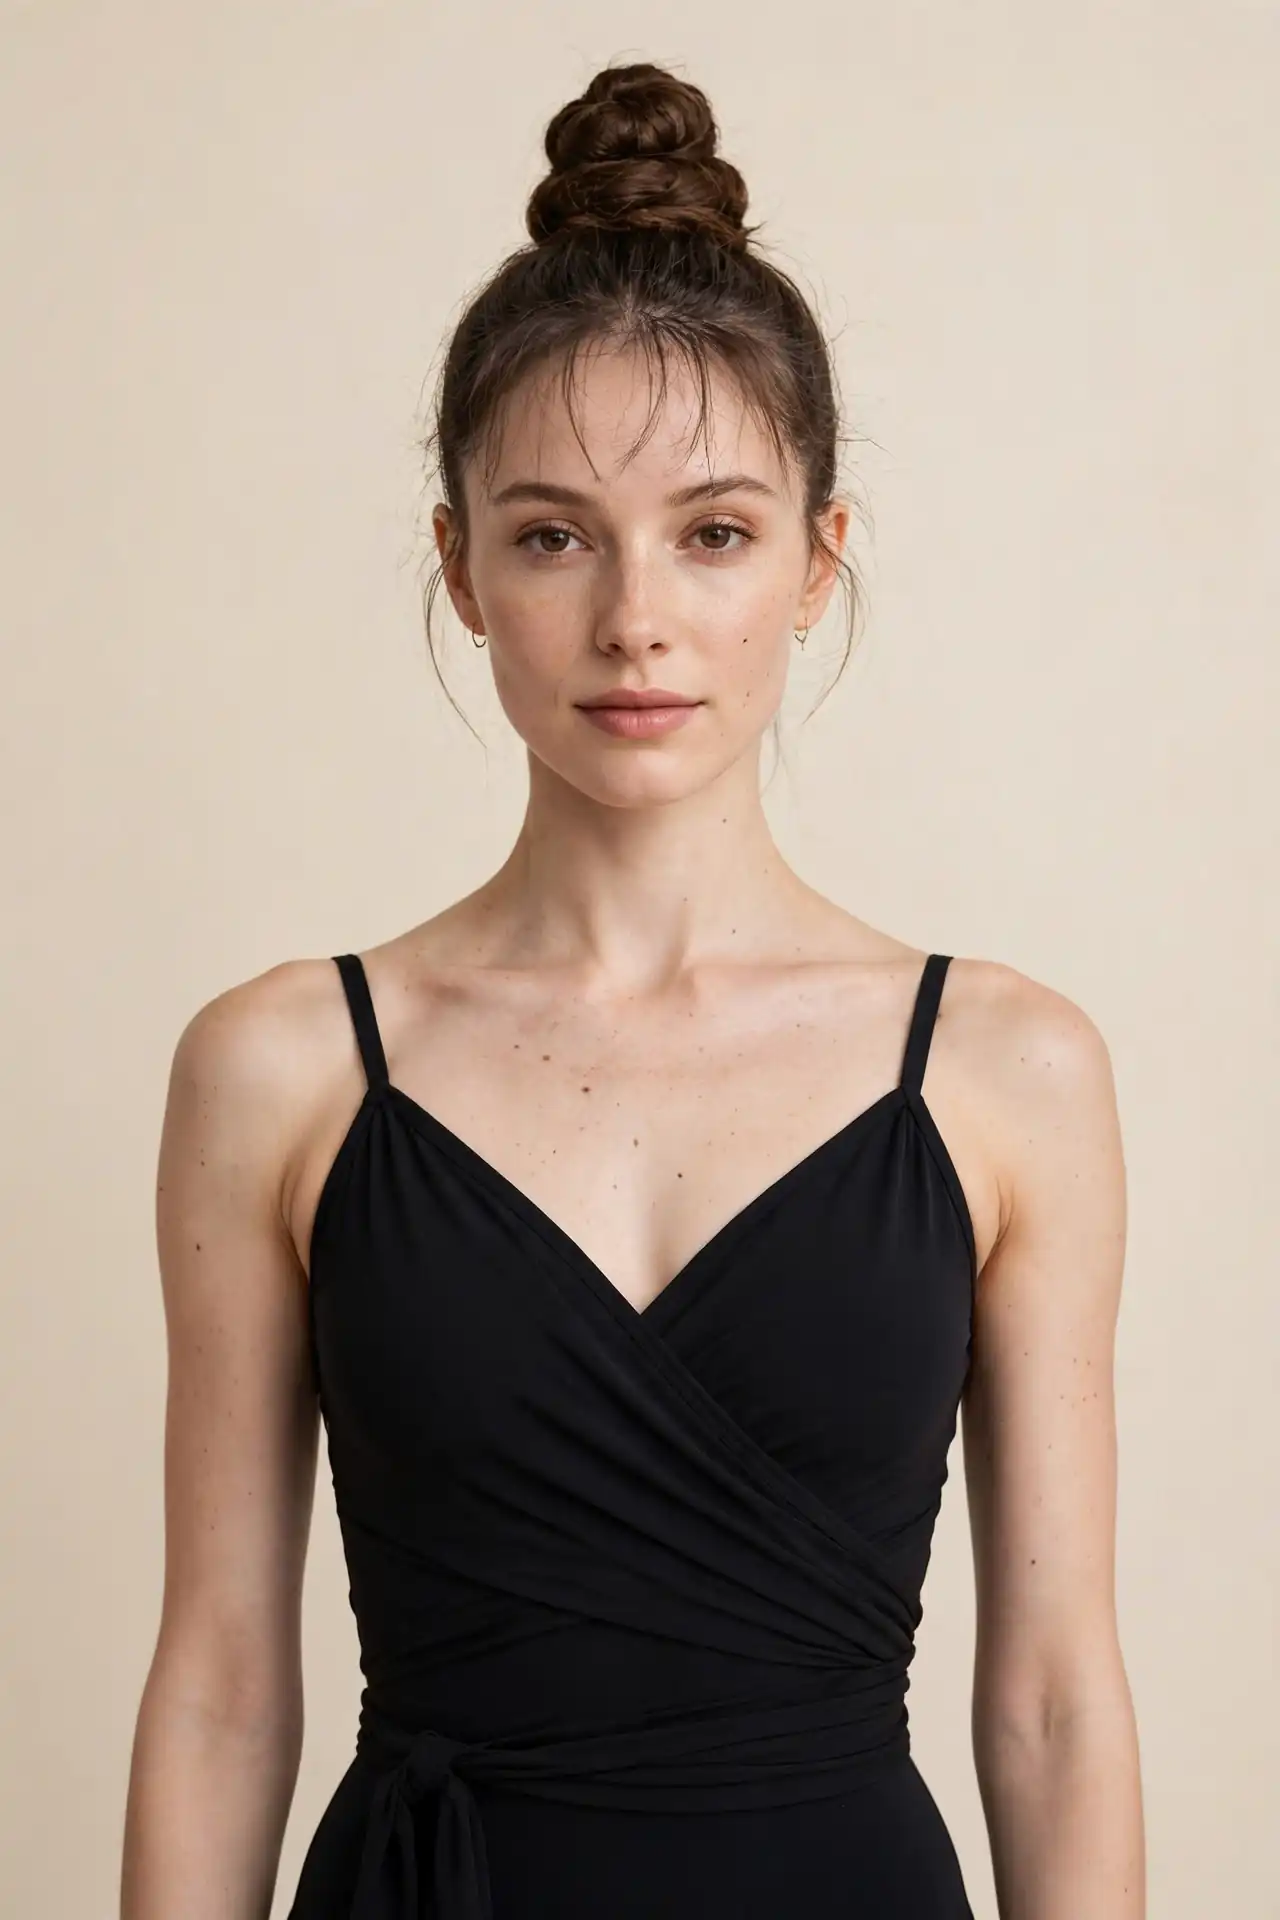
The Middle-Part Sleek Bun with a Side-Swept Fringe
Combining a sharp centre part with a fringe swept diagonally across the forehead sounds contradictory. In practice it produces one of the most flattering versions here. The centre part creates symmetry through the crown while the diagonal fringe breaks that symmetry at the face, which stops the whole look reading flat. It’s particularly useful for anyone who finds a strict middle part too severe on its own. Smooth the sides with a serum and a soft-bristle brush, then set the fringe separately with a small round brush directed downward and away from the face.
Round and square faces benefit most from the diagonal line, since it introduces an angle where the face doesn’t naturally have one.
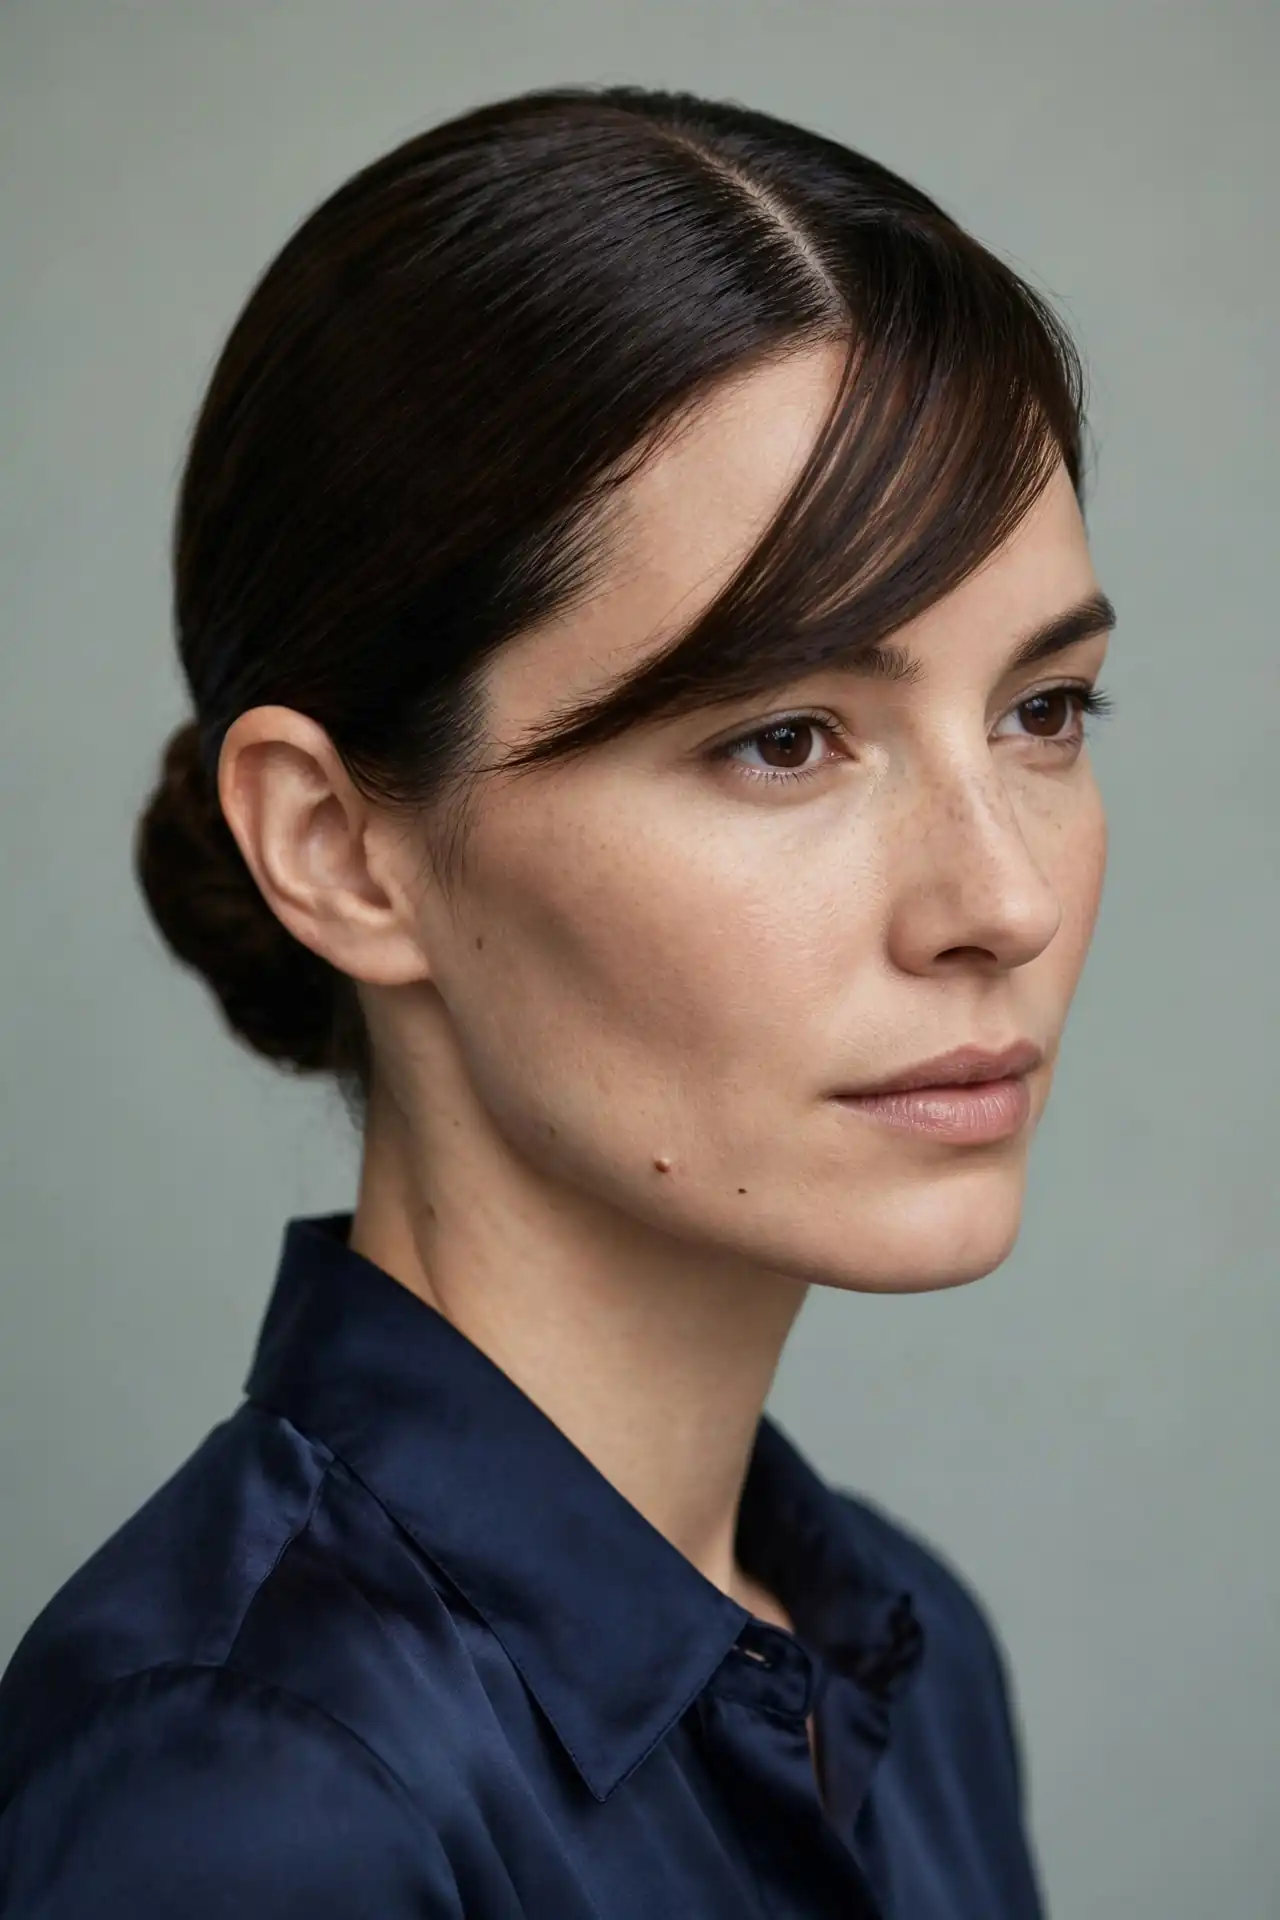
Soft and Undone Buns with Bangs
Deliberately imperfect finishes have overtaken rigid perfection, and the fringe becomes even more important here because it’s doing the shaping that the loose bun isn’t.
The Messy Bun with Curtain Bangs
Most people assume a messy bun requires no technique. That assumption is why so many collapse by lunchtime. Hair forecaster and stylist Tom Smith has explained that this look works best two or three days after washing, since freshly cleaned hair lacks grip. His method involves flipping your head upside down and shaking the hair out before securing it, then twisting the ends upward and pinning. Finish with a strong-hold hairspray, because without it the softness becomes genuine mess rather than styled undone.
Curtain bangs are the natural partner. They’re already cut to fall on either side of the face, which means they do the styling work for you the moment you tie your hair up. There’s no adjusting, no coaxing. The pairing has become the default off-duty look for exactly that reason: it takes under three minutes and still reads deliberate.
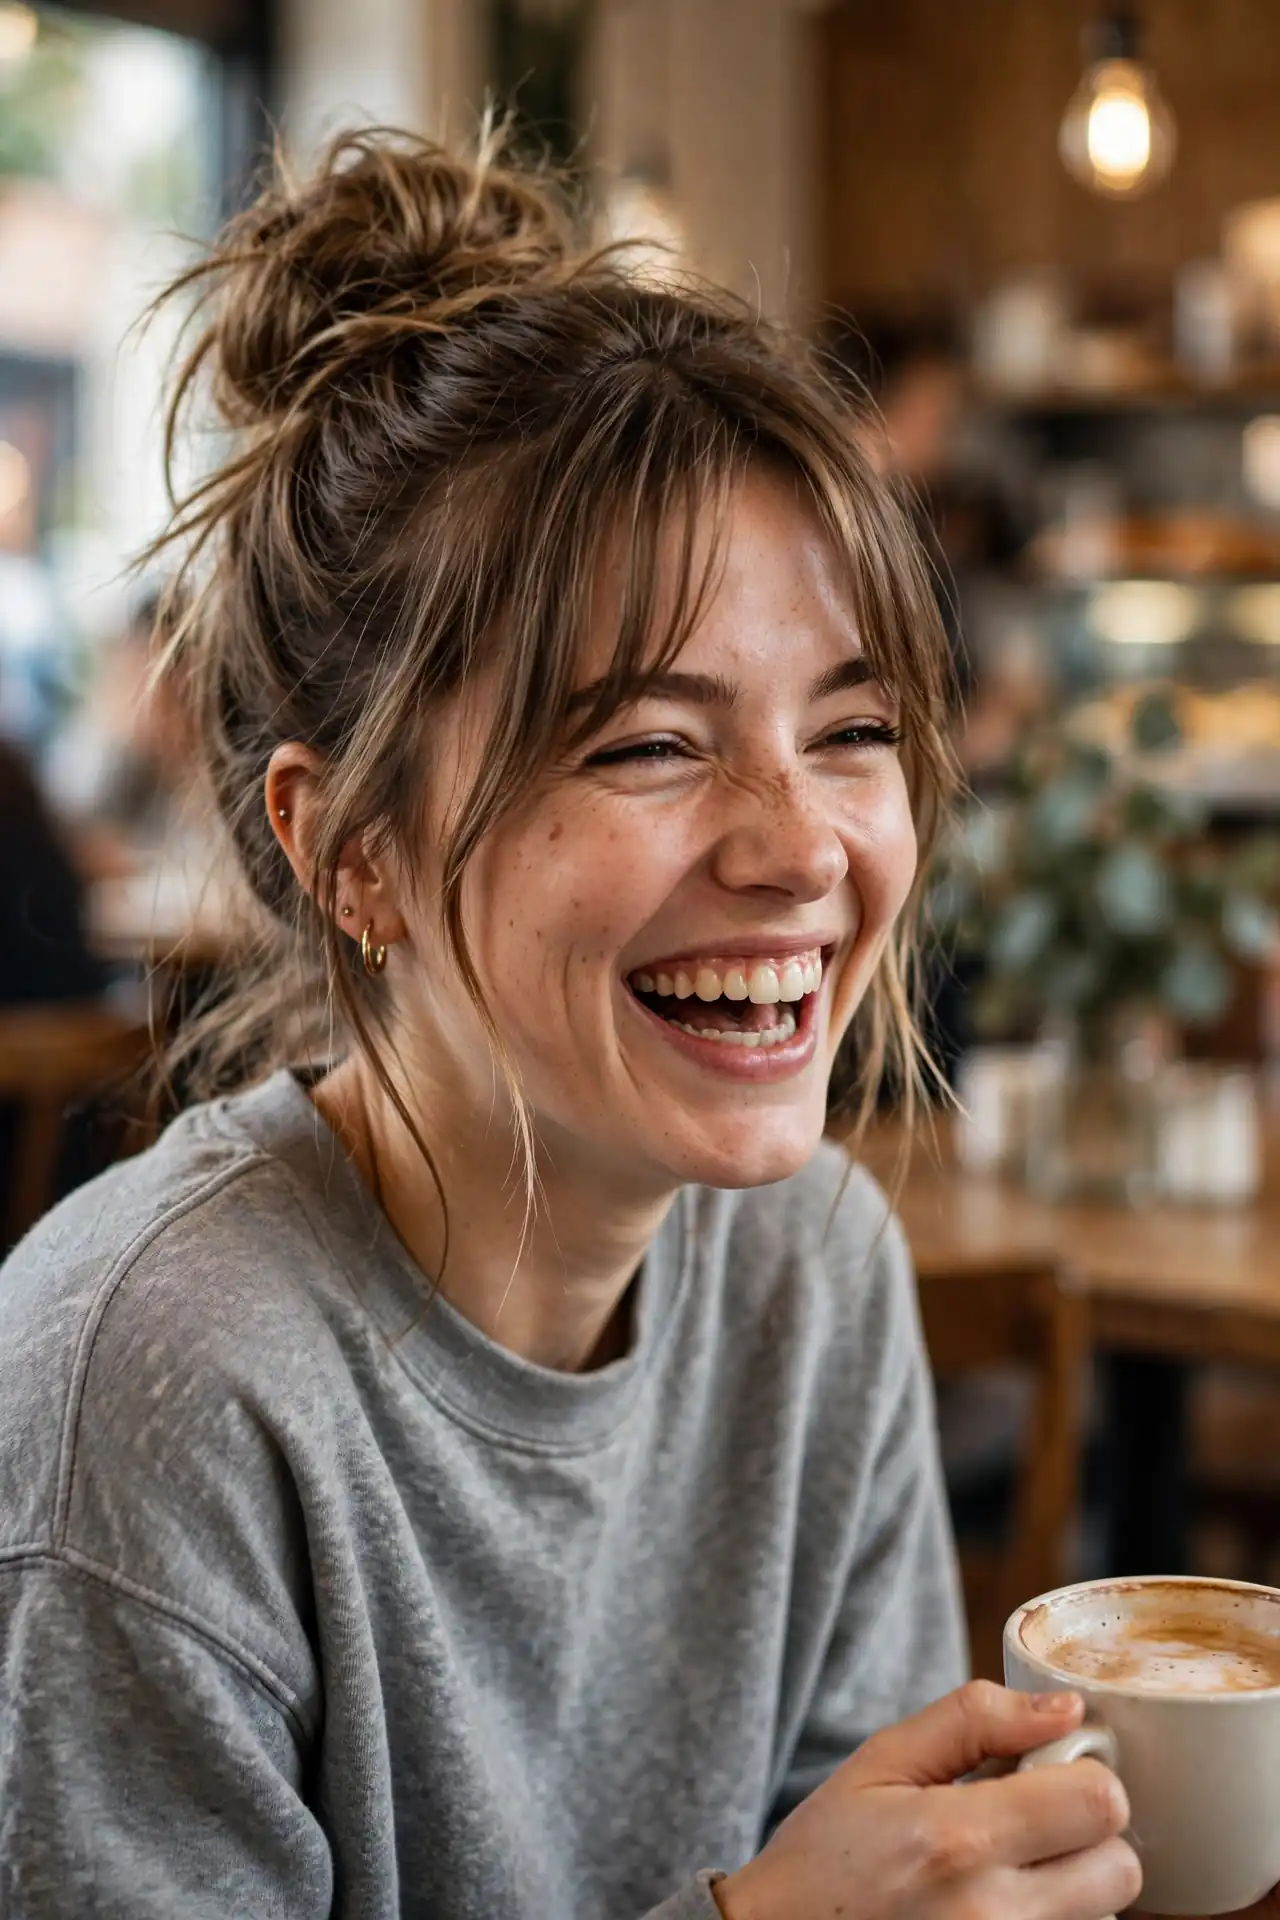
The Loose Nape Bun with Long Airy Bangs
An airy knot resting at the nape with long, feathered fringe pieces framing the face feels romantic in a way that structured updos simply don’t. This is the pairing for anyone who wants bangs without a commitment to constant styling. Long curtain bangs falling to the cheekbones or jawline blend beautifully into a loose updo, and because they’re already long, they need trimming far less often than a short fringe. Every five to six weeks is realistic, compared to fortnightly for micro bangs.
The bun itself should be loosened deliberately once secured. Tug gently upward at the crown to create lift, pull two pieces free at the temples, and leave the knot slightly asymmetric. Everyday errands, weekend plans, festive evenings. It handles all three without adjustment, which is a rare range for one look.

The Undone Chignon with a Wispy Fringe
Sitting a step above a messy bun in polish while staying firmly relaxed, this is the version that works when you’re not sure how dressed up the occasion actually is. What makes it work:
- Smooth the top section with a lightweight cream, leave the knot itself textured
- Pin in an X pattern underneath rather than pushing pins straight in
- Keep the fringe light enough that your eyes stay visible through it
- Add a slight side part so the whole thing doesn’t read symmetrical
- Use almost no product on the fringe, since wispy bangs go greasy fast
The airy fringe keeps a lifted chignon from feeling severe while the loose pieces around the face add softness. Office wear, dinner plans and wedding guest outfits all suit it.
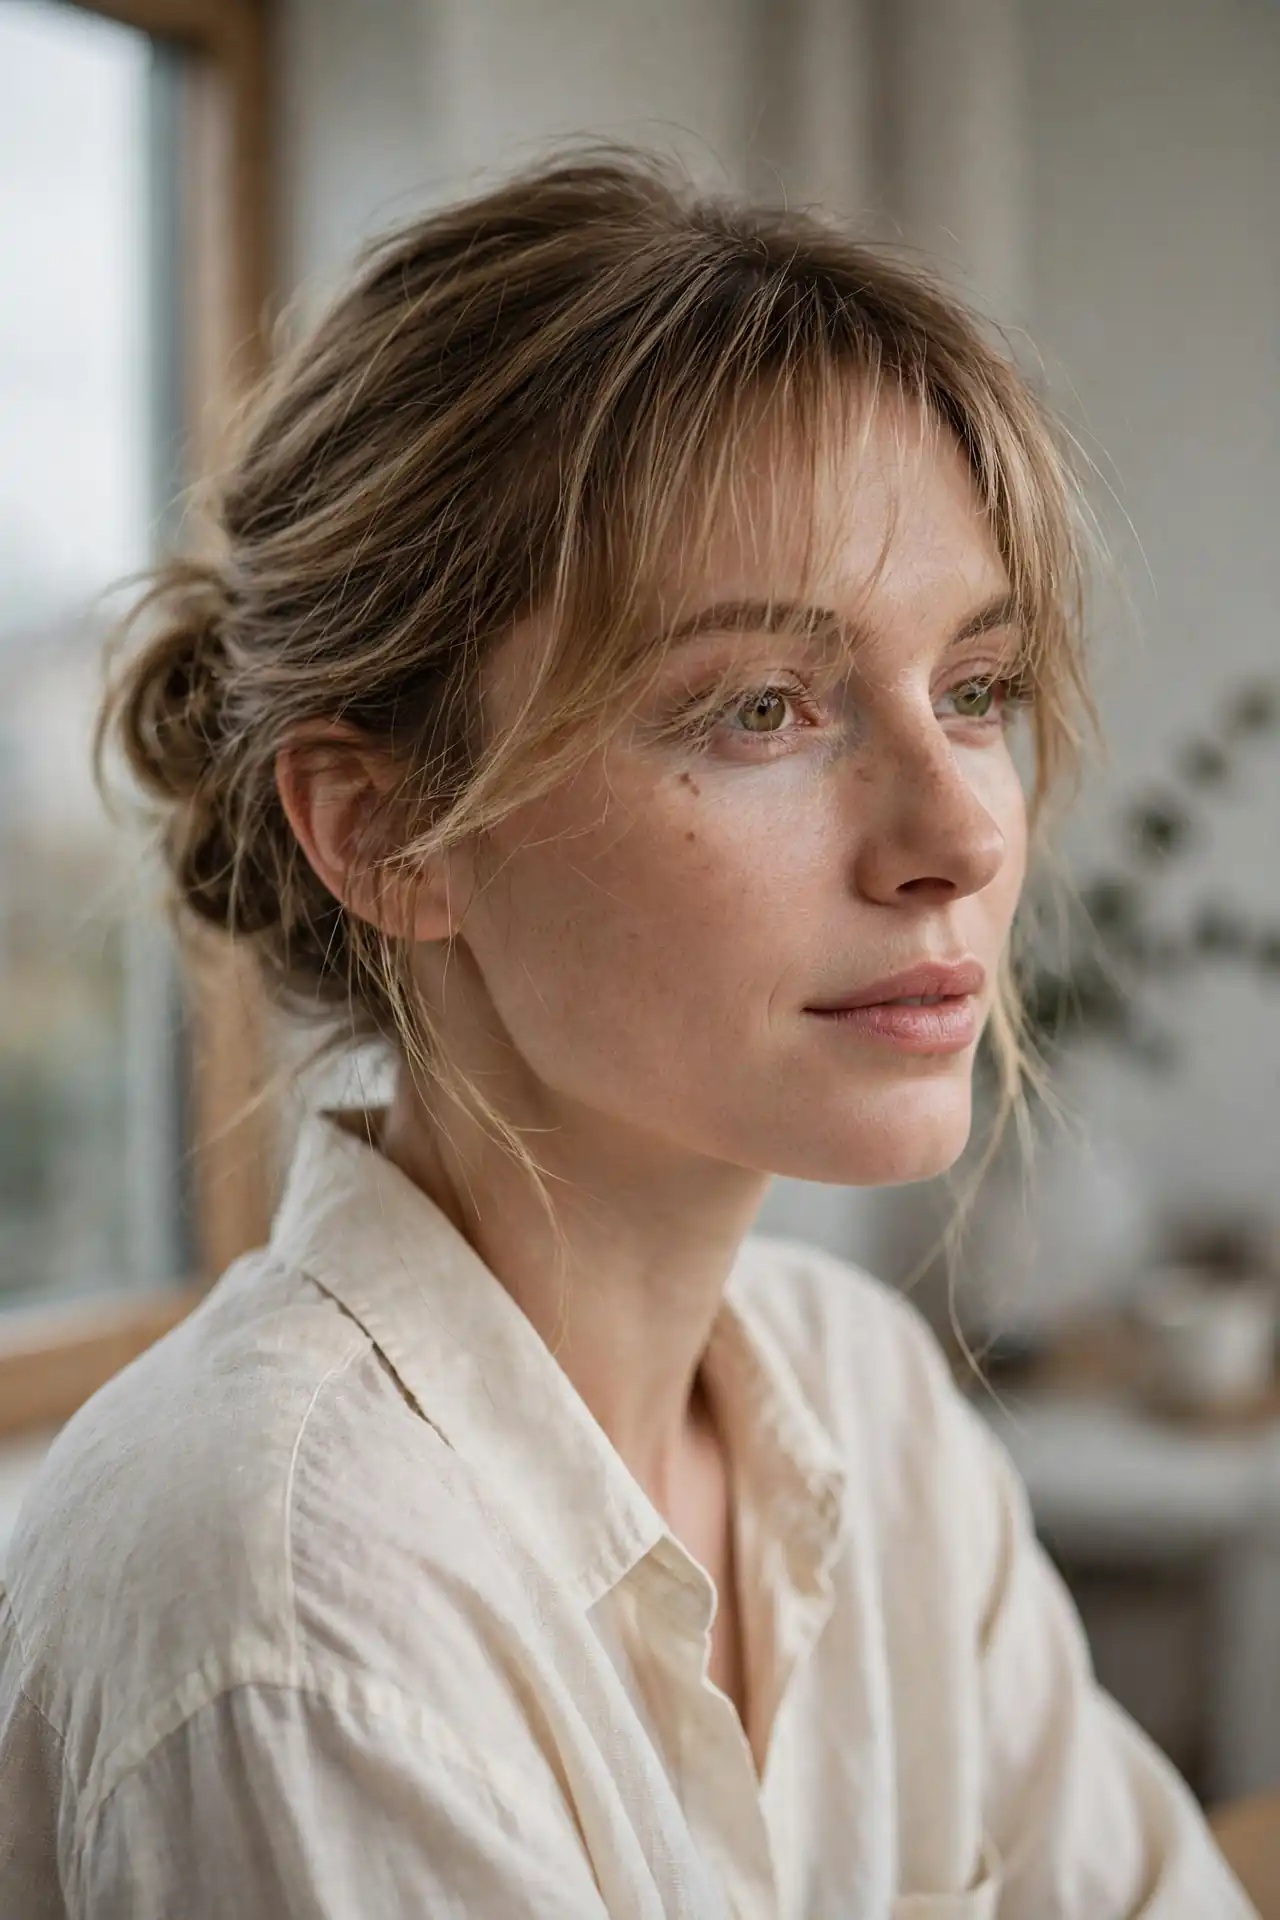
The Claw Clip Bun with Face-Framing Pieces
Four seconds, no pins, and no tension on your scalp whatsoever. Twist the length, fold it upward against the head, and clamp. What turns this from functional into styled is what you leave out at the front. Two face-framing pieces plus your existing fringe creates a soft frame around the face while the clip handles everything else. Larger clips grip better than small ones, which slip under the weight of anything past shoulder length.
Claw clips have quietly become one of the defining updo choices of the past few years precisely because they hold without the pulling that a tight elastic creates. For anyone with a fringe, that matters more than usual, since tension at the hairline is what causes short bangs to lift and separate.
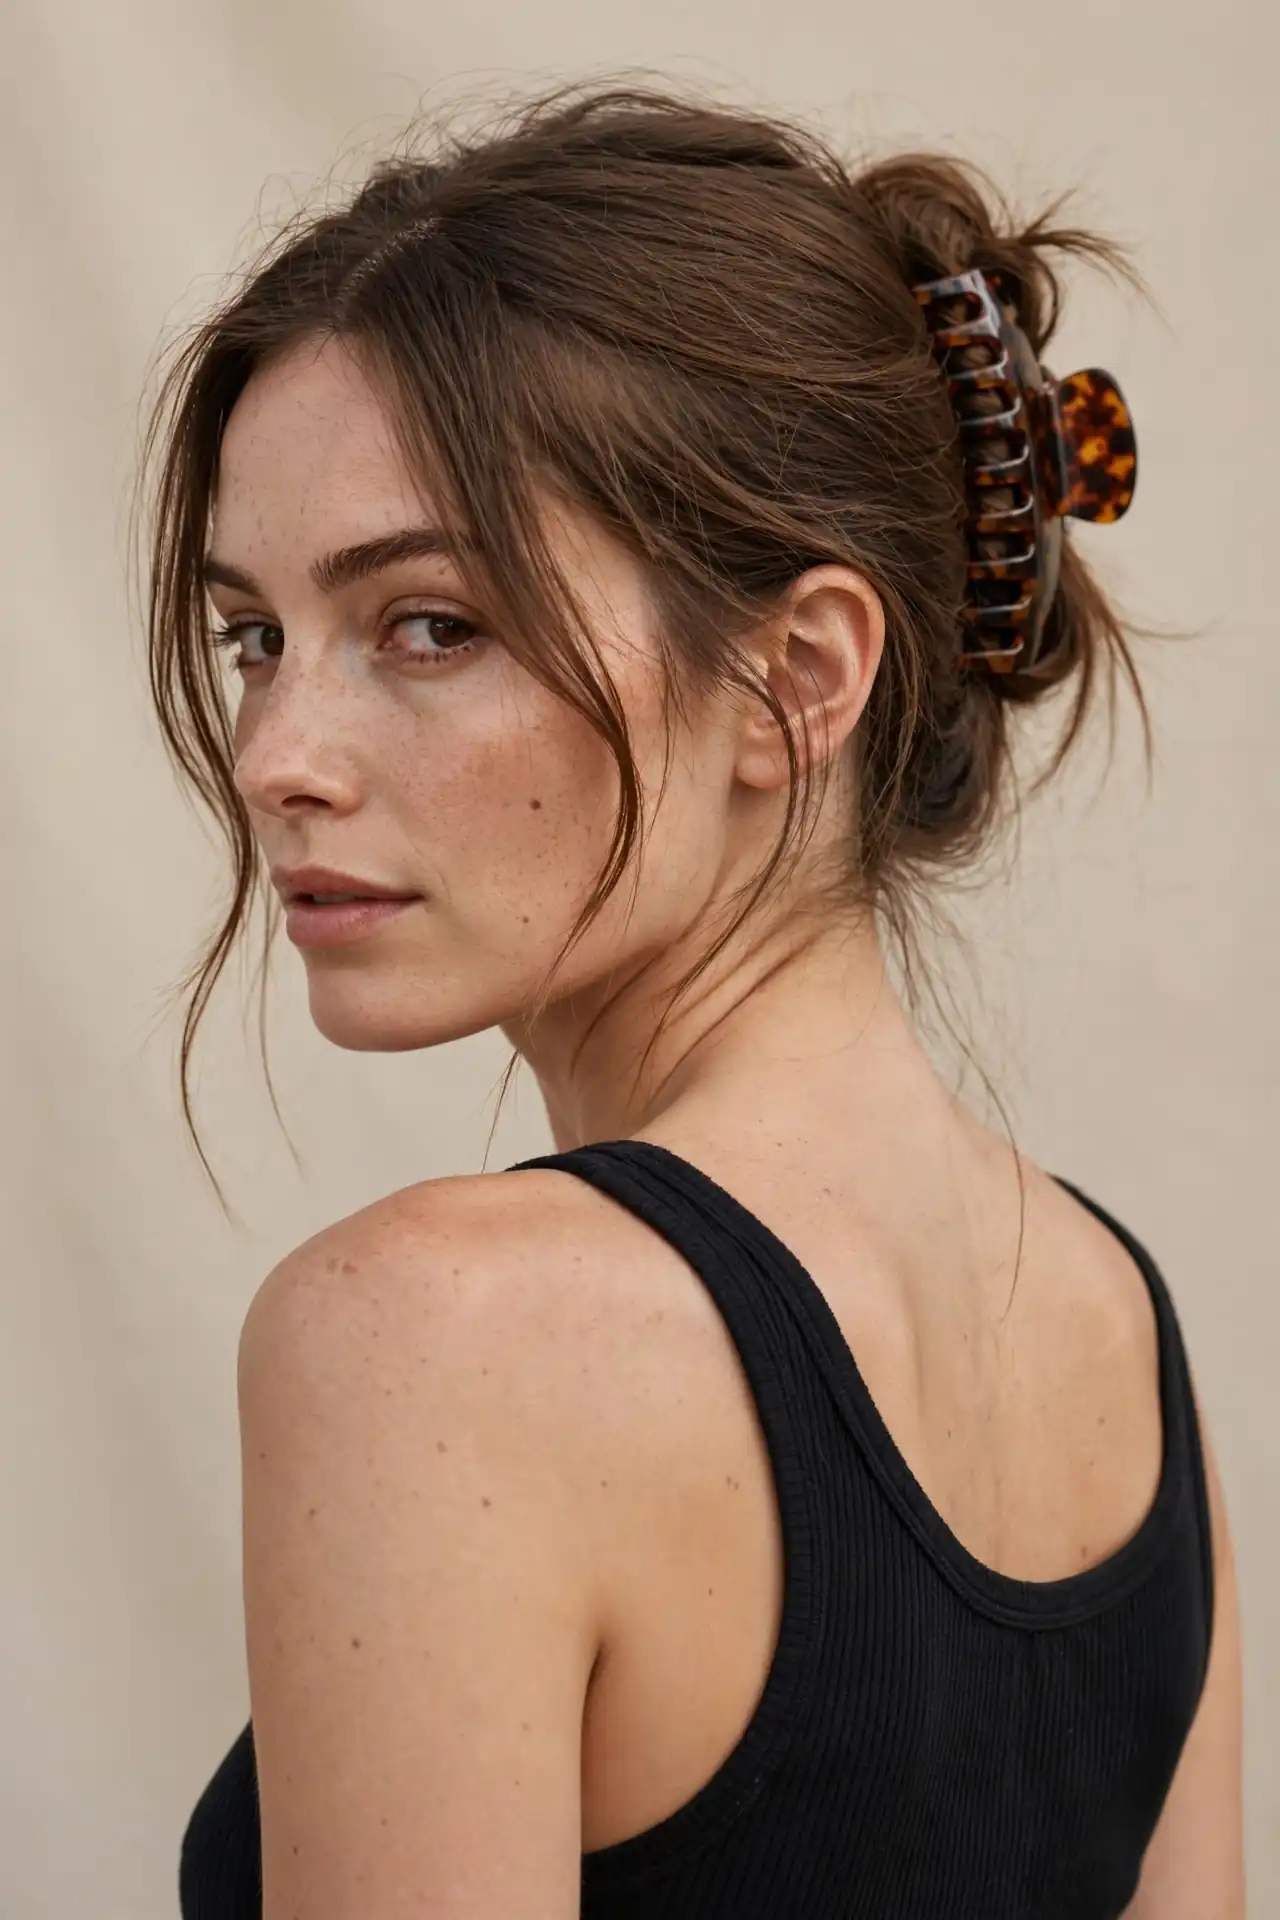
The Bouffant Low Bun with a Full Fringe
Feeling like your low bun makes your head look flat from the side? Adding height at the crown fixes it, and a fuller fringe balances that height at the front. Gently teasing the crown section before smoothing it over with a paddle brush creates lift that offsets the weight sitting at your neck. Three or four light passes at the roots is plenty. Overteasing produces a bump that reads dated rather than lifted, which is the most common mistake with this shape.
A denser fringe works better here than a wispy one, because the volume at the crown needs something with equivalent presence at the front. Otherwise the proportions tip backward. Pair it with a strapless or V-neck neckline and the gentle rise at the crown complements that line rather than competing with it.
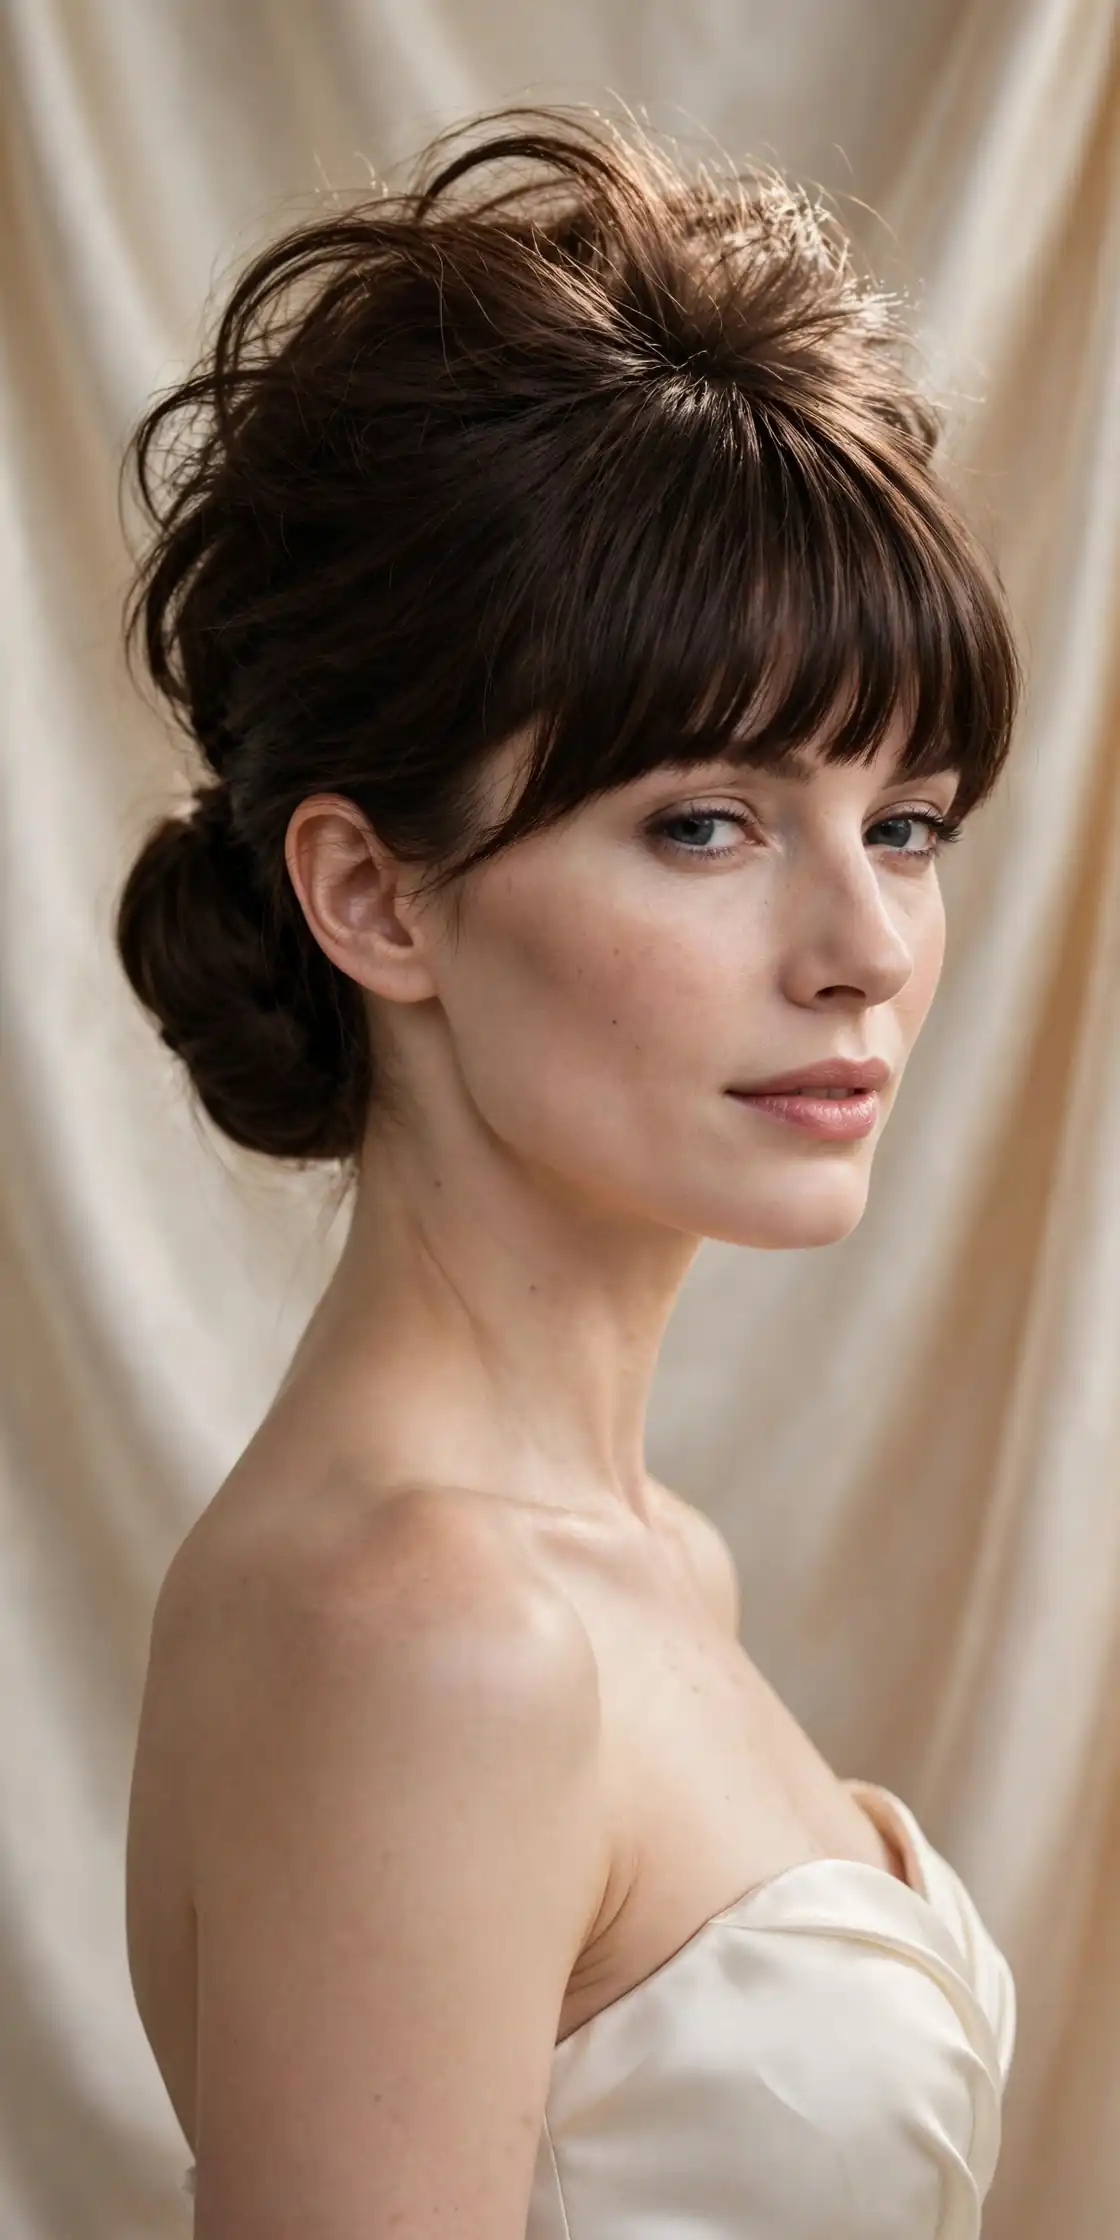
Braided and Twisted Buns with Bangs
Adding structure before you coil gives the bun visible texture, and a fringe keeps that texture from looking too intricate or formal.
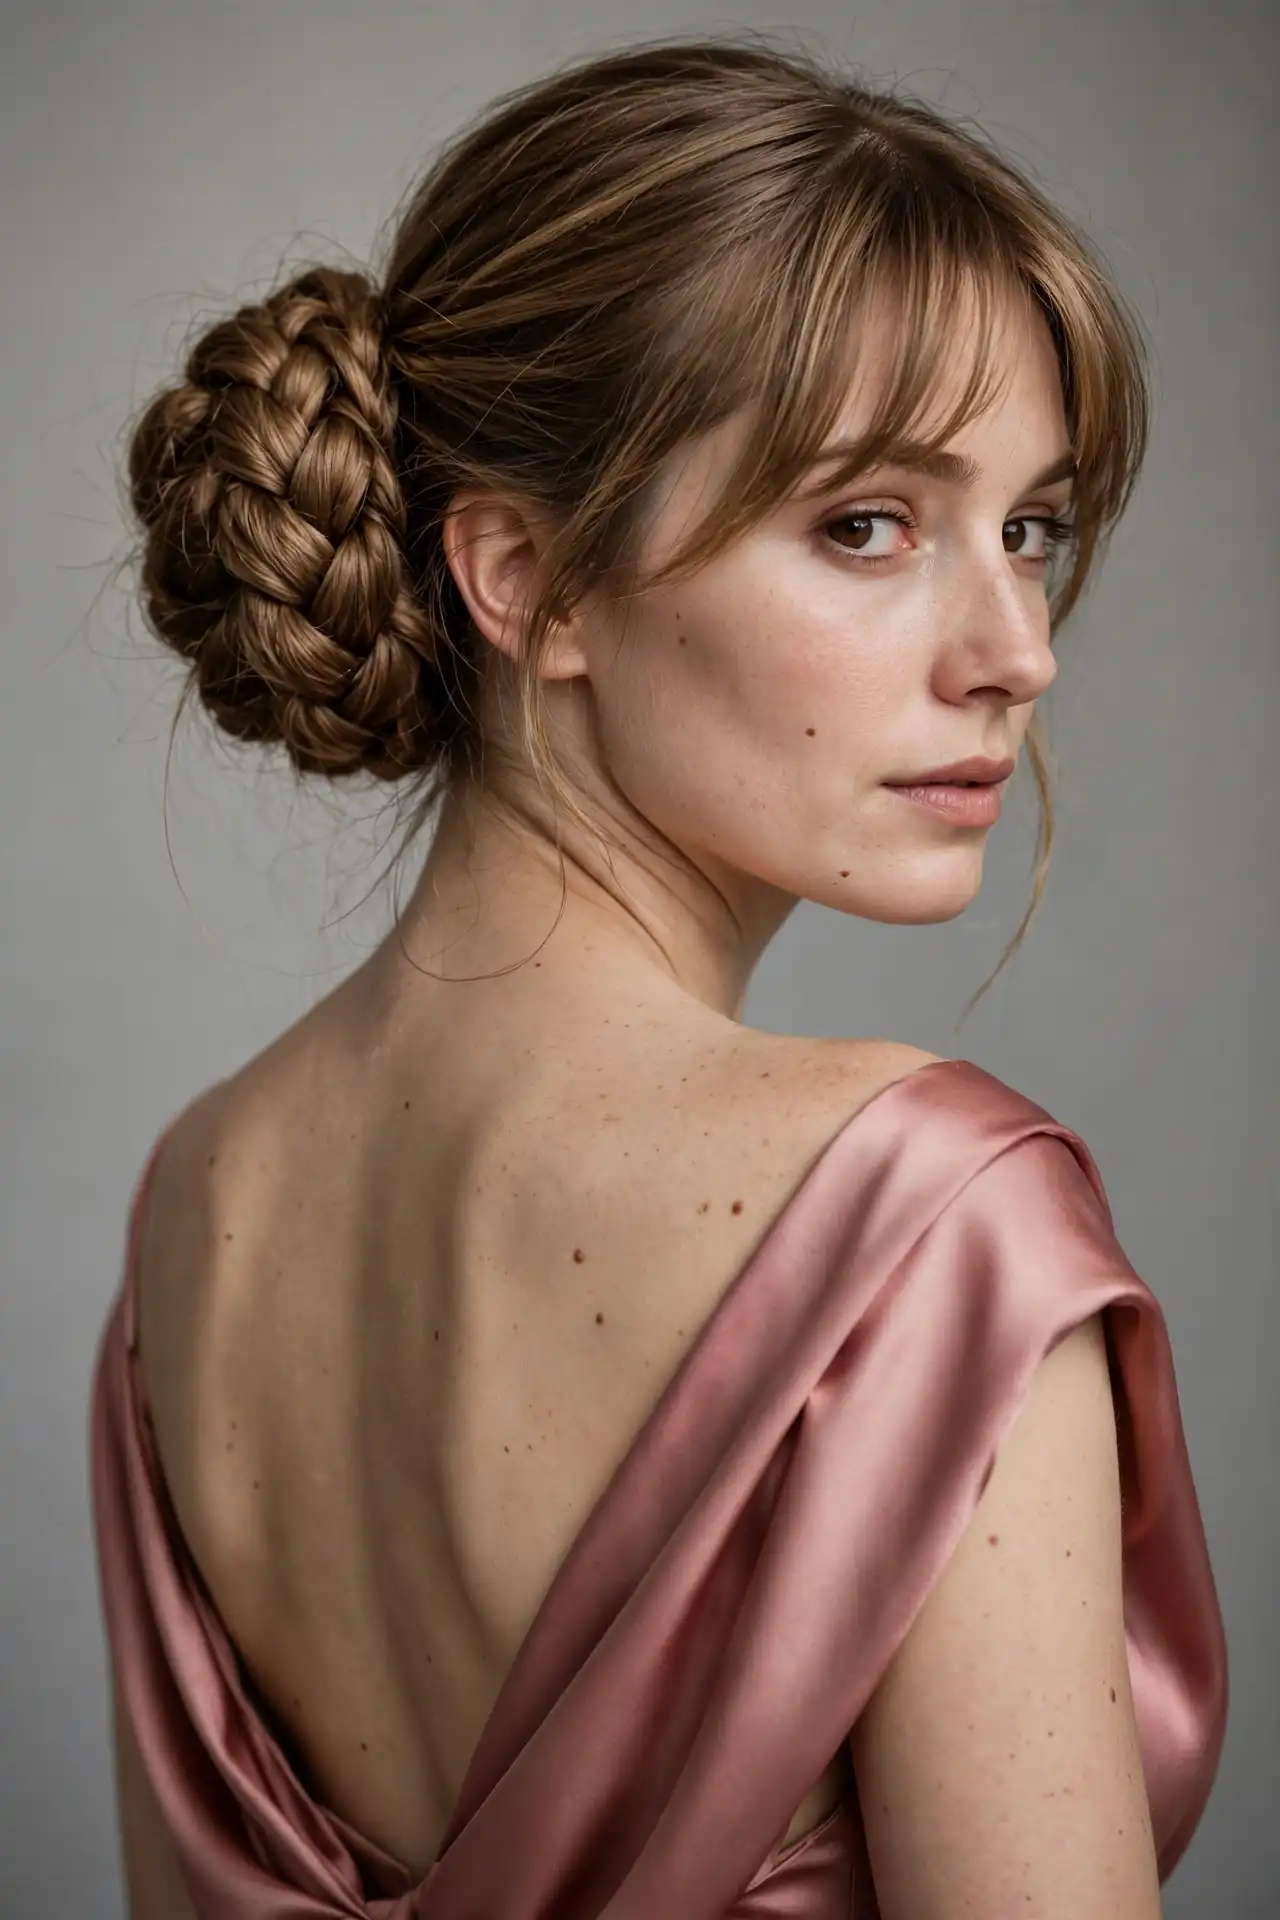
The Braided Bun with Curtain Bangs
Why does braiding first make such a difference? Because it expands the hair’s surface area, so the finished knot looks noticeably fuller than the same hair simply twisted. Stylists reach for this specifically when a client has fine hair but wants a bun with visible substance. Pancake the braid before wrapping it, meaning pull the outer edges outward gently, and the volume roughly doubles. Work from the bottom of the braid upward, holding the base steady so the whole thing doesn’t loosen.
Curtain bangs balance the intricacy. Braided buns can read quite formal on their own, particularly the tighter versions, and a soft centre-parted fringe pulls the whole look back toward everyday wearability. Weddings, galas and occasions where you want visible effort suit this combination, but it also works on a normal Tuesday if you keep the braid loose.
The Twisted Low Bun with a Side-Swept Fringe
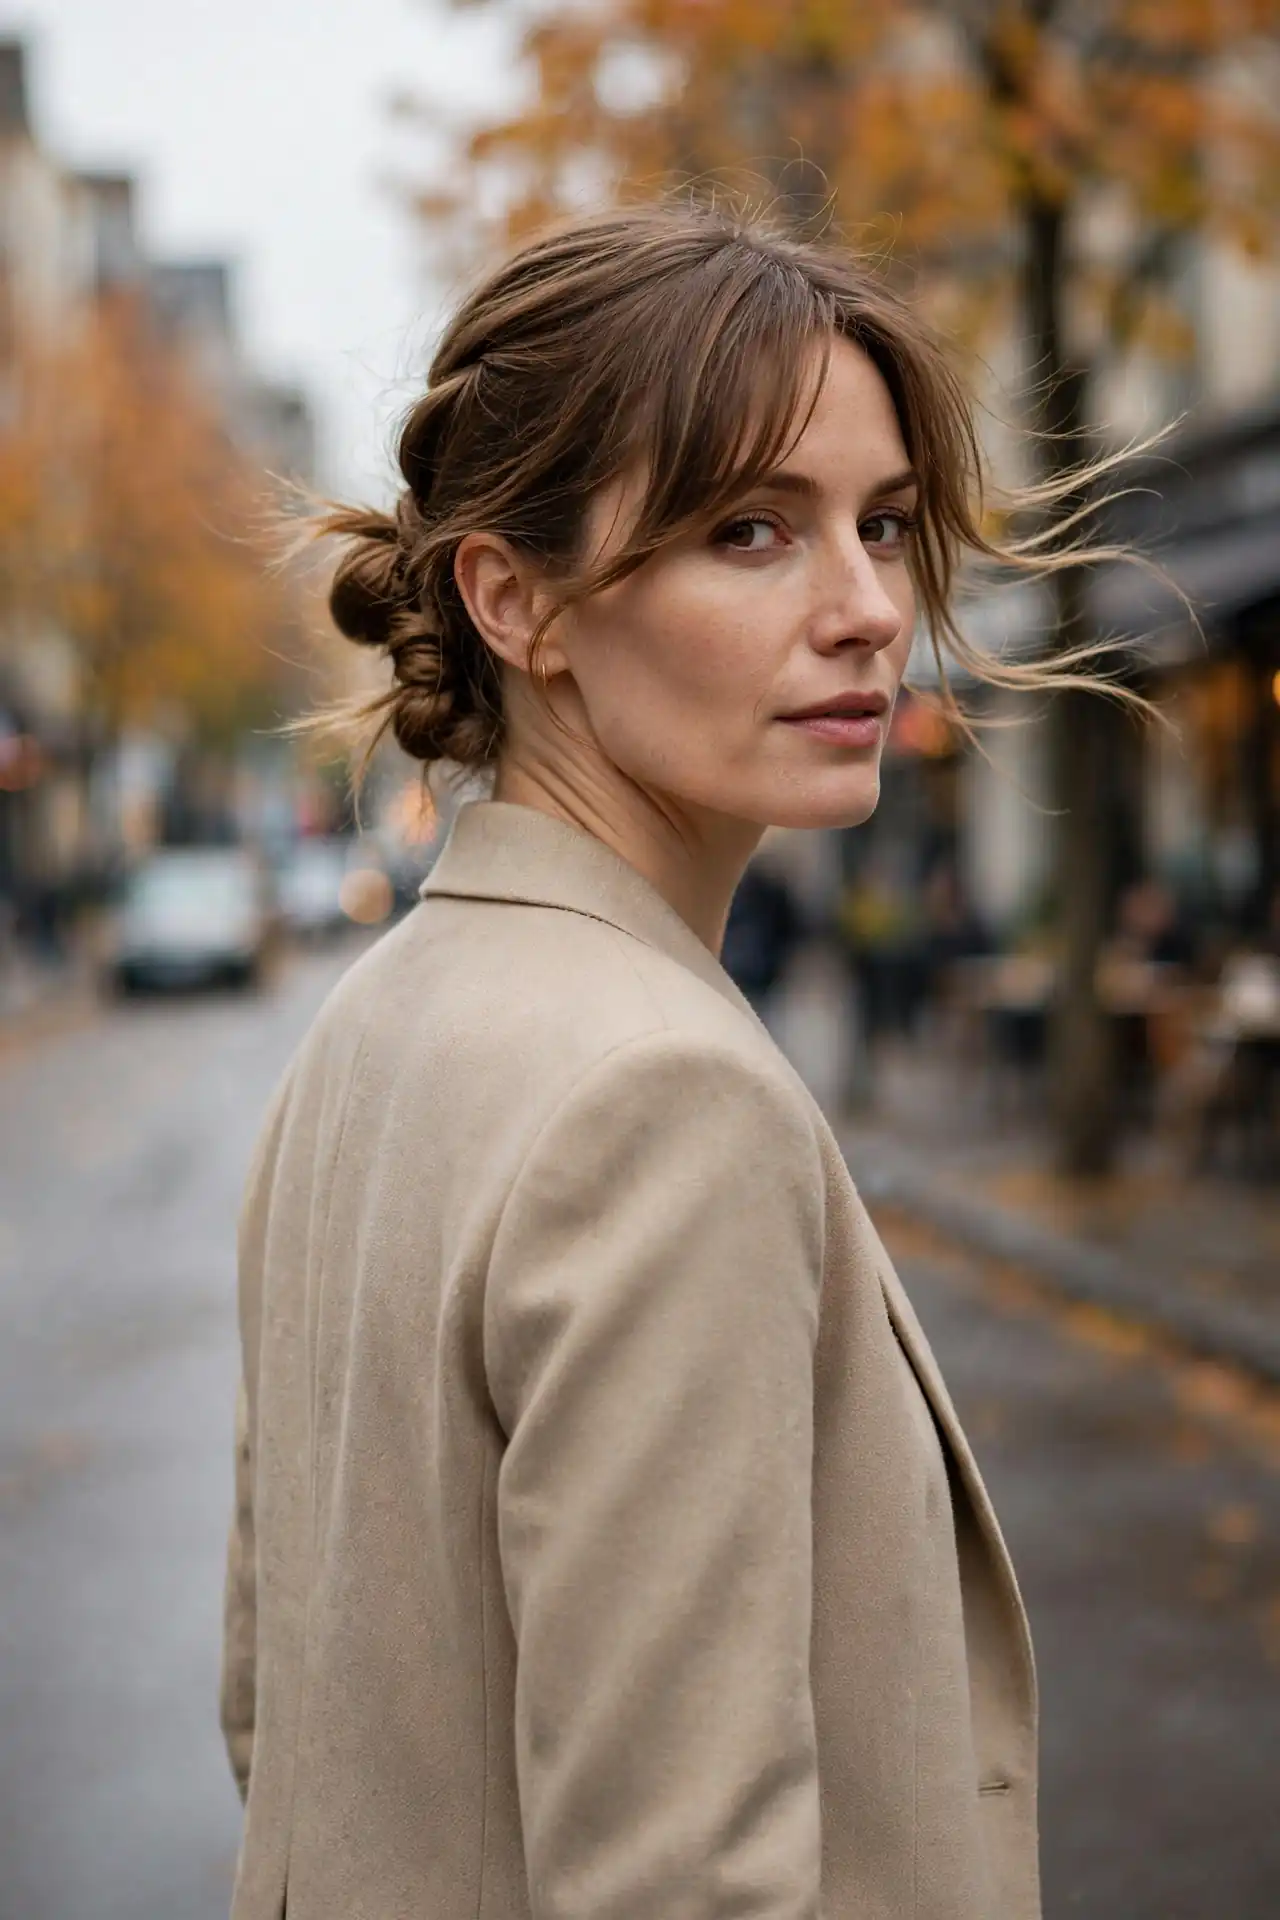
Twisting the hair into two ropes before knotting them at the nape adds a pattern that looks technical and requires no braiding skill at all. The trick is direction. Twist each section individually in the same direction, then wind them around each other in the opposite direction. That counter-twist is the only thing stopping the whole arrangement unravelling, and getting the directions right matters far more than neatness does.
A side-swept fringe complements the diagonal movement of the twists, since both elements travel across rather than straight down. It takes under five minutes once you’ve done it twice. Birthdays, office days, evening plans, all covered.
The Rope Twist Bun with Micro Bangs
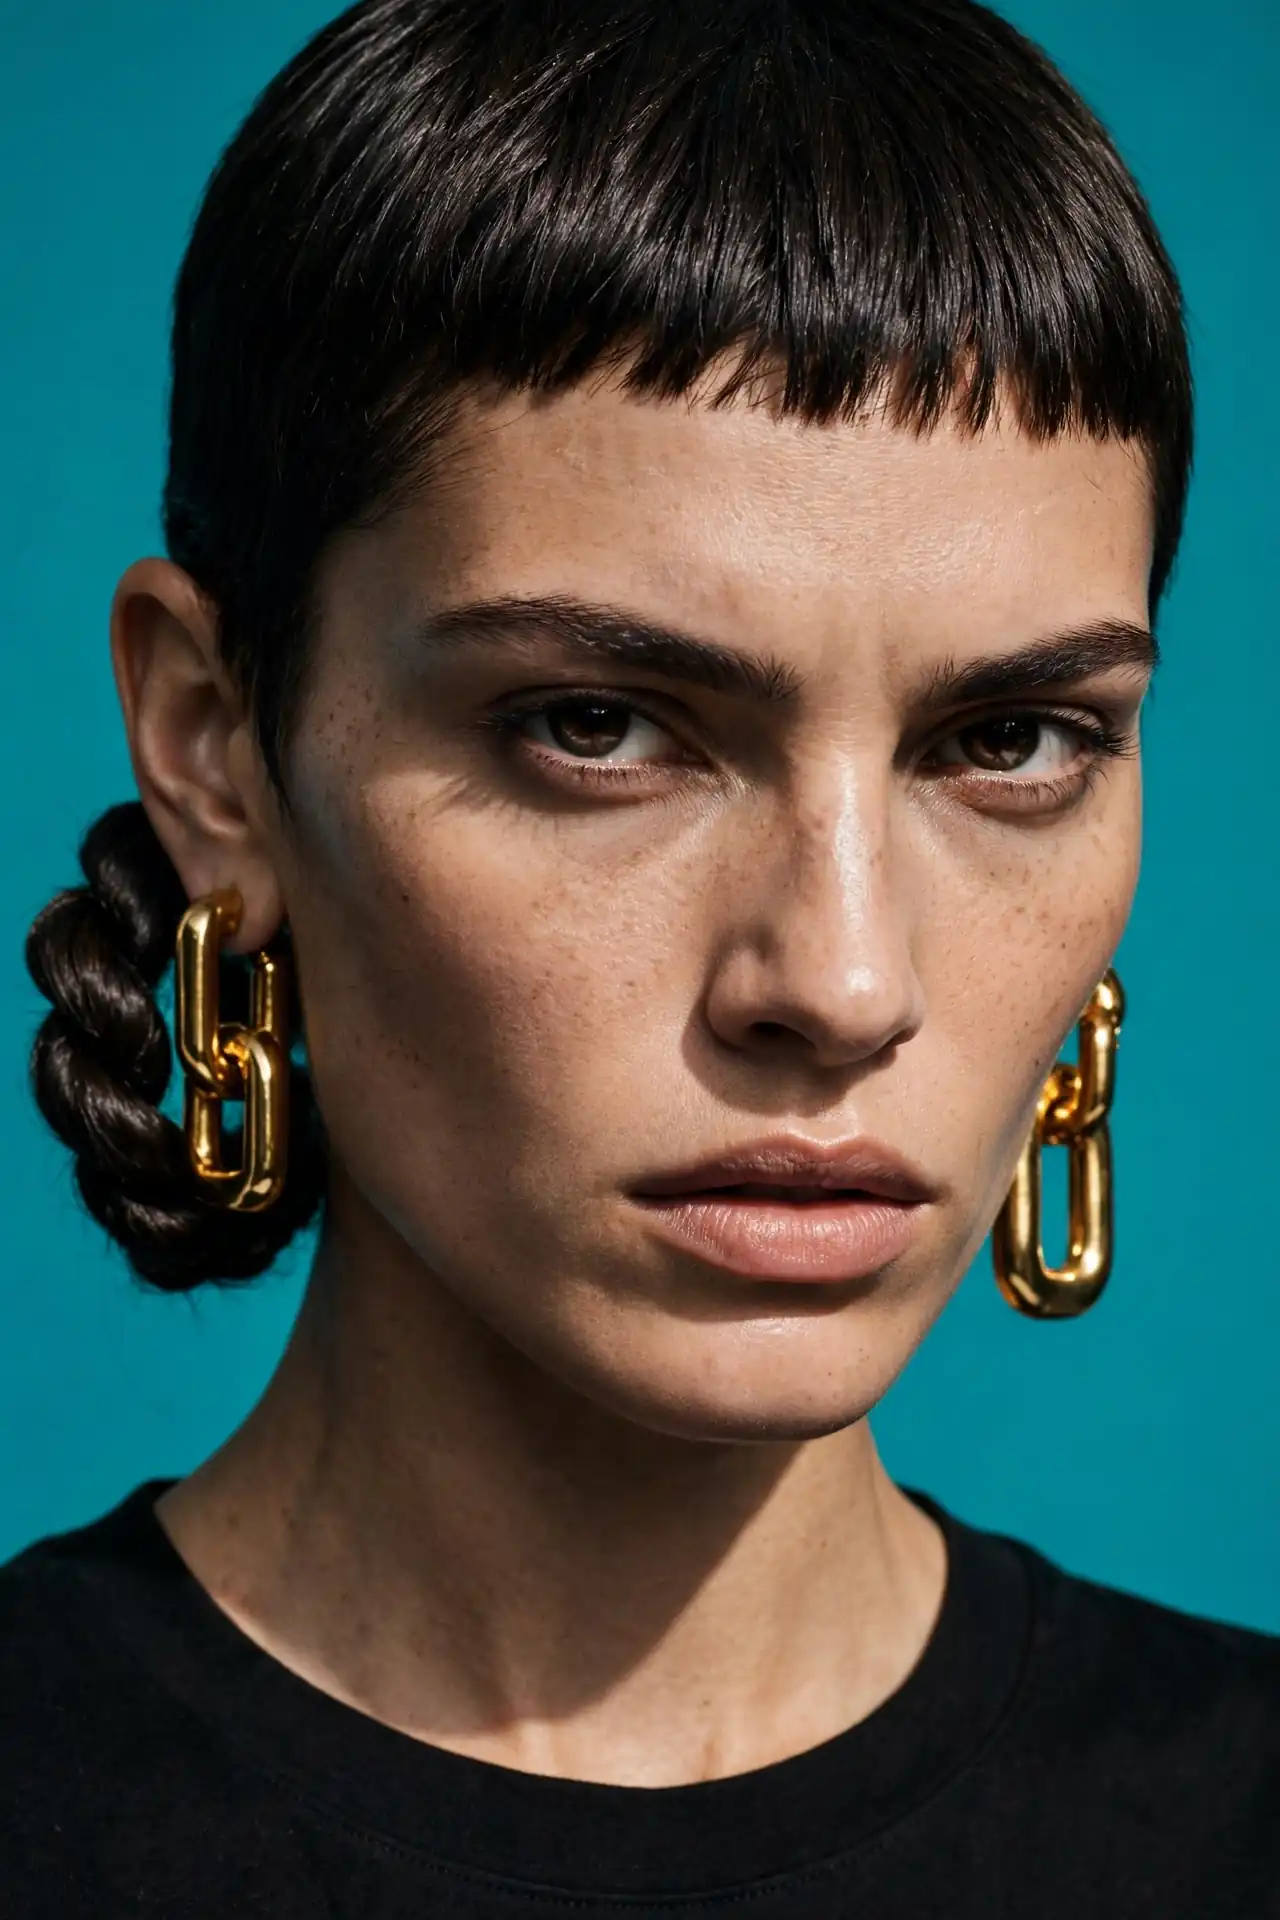
Two minutes for the bun, and a fortnightly trim for the fringe. Those are the honest numbers on this combination. The spiral pattern of a rope twist reads as texture without any obvious effort, and it happens to disguise oily roots effectively because the twisting breaks up the hair’s surface. Against that soft spiral, micro bangs provide hard contrast, which is what makes the pairing interesting rather than merely neat.
Be realistic about the fringe though. Micro bangs sitting high on the forehead change shape with even a few millimetres of growth, so this is the highest-maintenance fringe on the list. It also exposes the full width of your forehead, which suits oval and heart-shaped faces considerably better than round ones.
The Halo Braid Bun with a Wispy Fringe
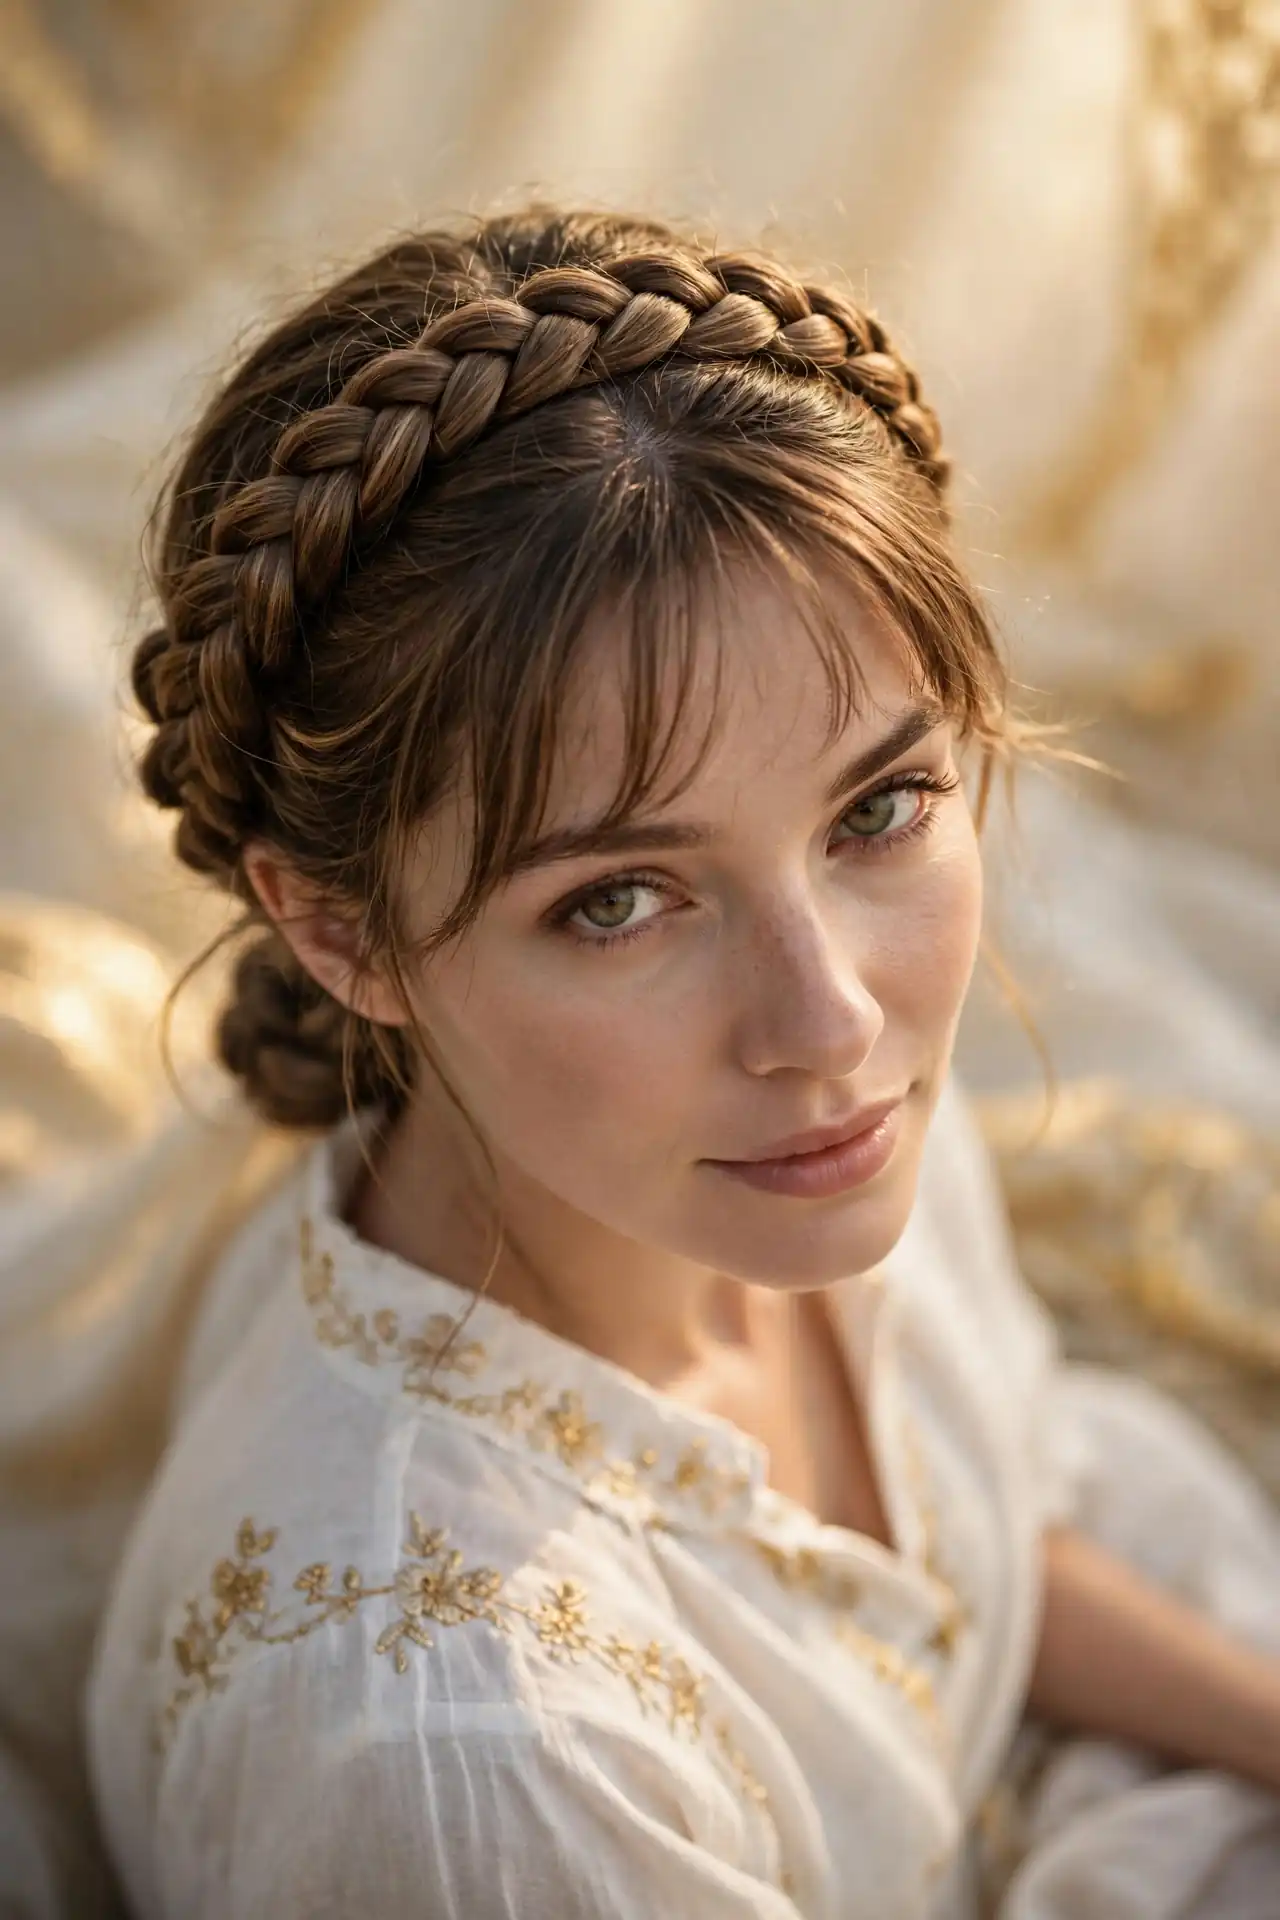
Wrapping a braid around the crown before securing the remaining length into a low knot creates a genuinely regal silhouette that photographs beautifully from every angle. The technique is more forgiving than it looks. The braid only needs to be neat where it faces forward, so the sections at the back can be considerably rougher and nobody will ever see them. Pin every four inches so it doesn’t shift as the evening goes on. Longer hair works better, since you need enough length to circle the head and still have something left to knot.
A wispy fringe is the right partner here because the halo braid is already a strong feature. Anything denser at the front competes with it, and the whole thing starts to look busy rather than considered.
Buns with Statement Fringes
Sometimes the fringe is the haircut and the bun is simply getting everything else out of the way.
The High Bun with a Blunt Brow-Skimming Fringe
Ninety percent of this look’s impact comes from the fringe, and the bun exists to let it dominate. A dense fringe cut straight across at brow level, worn above a smooth high bun, produces something genuinely graphic. There’s no softening, no blending, no face-framing pieces. It reads editorial and confident, and it works best on thick straight hair that can hold a clean fringe line without separating.
The main thing to get right is proportion. A very heavy fringe with a very small bun looks top-heavy from the side, so build the bun with enough volume to balance the weight at the front. Teasing the ponytail lightly before coiling it solves this in about thirty seconds.
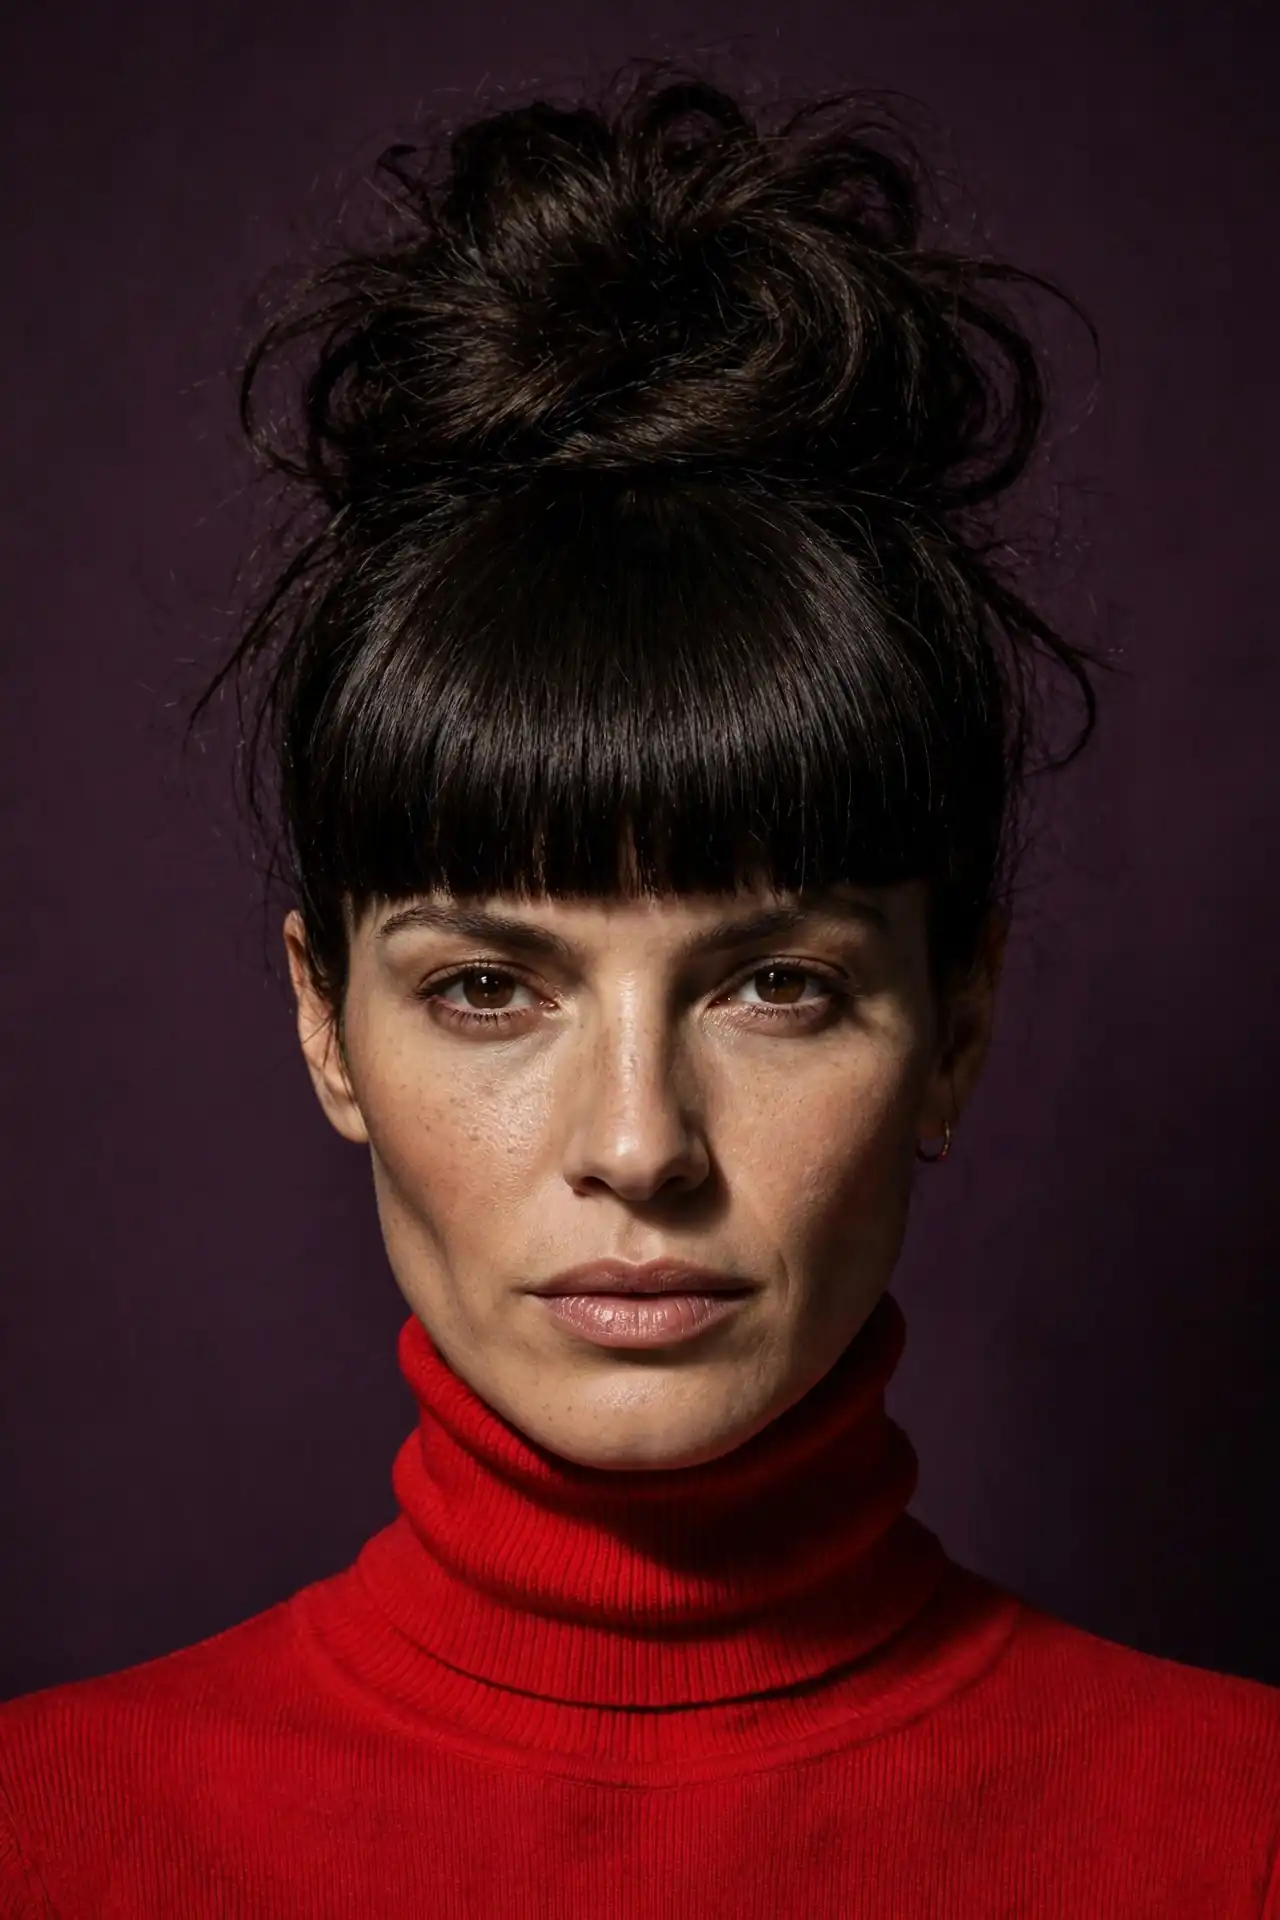
The Low Bun with Baby Bangs
Micro bangs paired with a compact knot at the nape create the most striking contrast on this list. Everything is minimal except one very deliberate detail. Andreas Wild, London stylist and John Frieda UK’s creative stylist adviser, has recommended cropped fringes specifically for a fuller, more rock and roll effect on short shapes, and the same logic applies when you pull length back into a bun. Because the bun removes all visual interest from the sides and back, the eye has nowhere to go except the fringe.
Two practical notes. Baby bangs need trimming every two weeks without exception, and they suit high foreheads considerably better than low ones, since a short fringe on a low hairline leaves very little forehead visible and can look cramped.
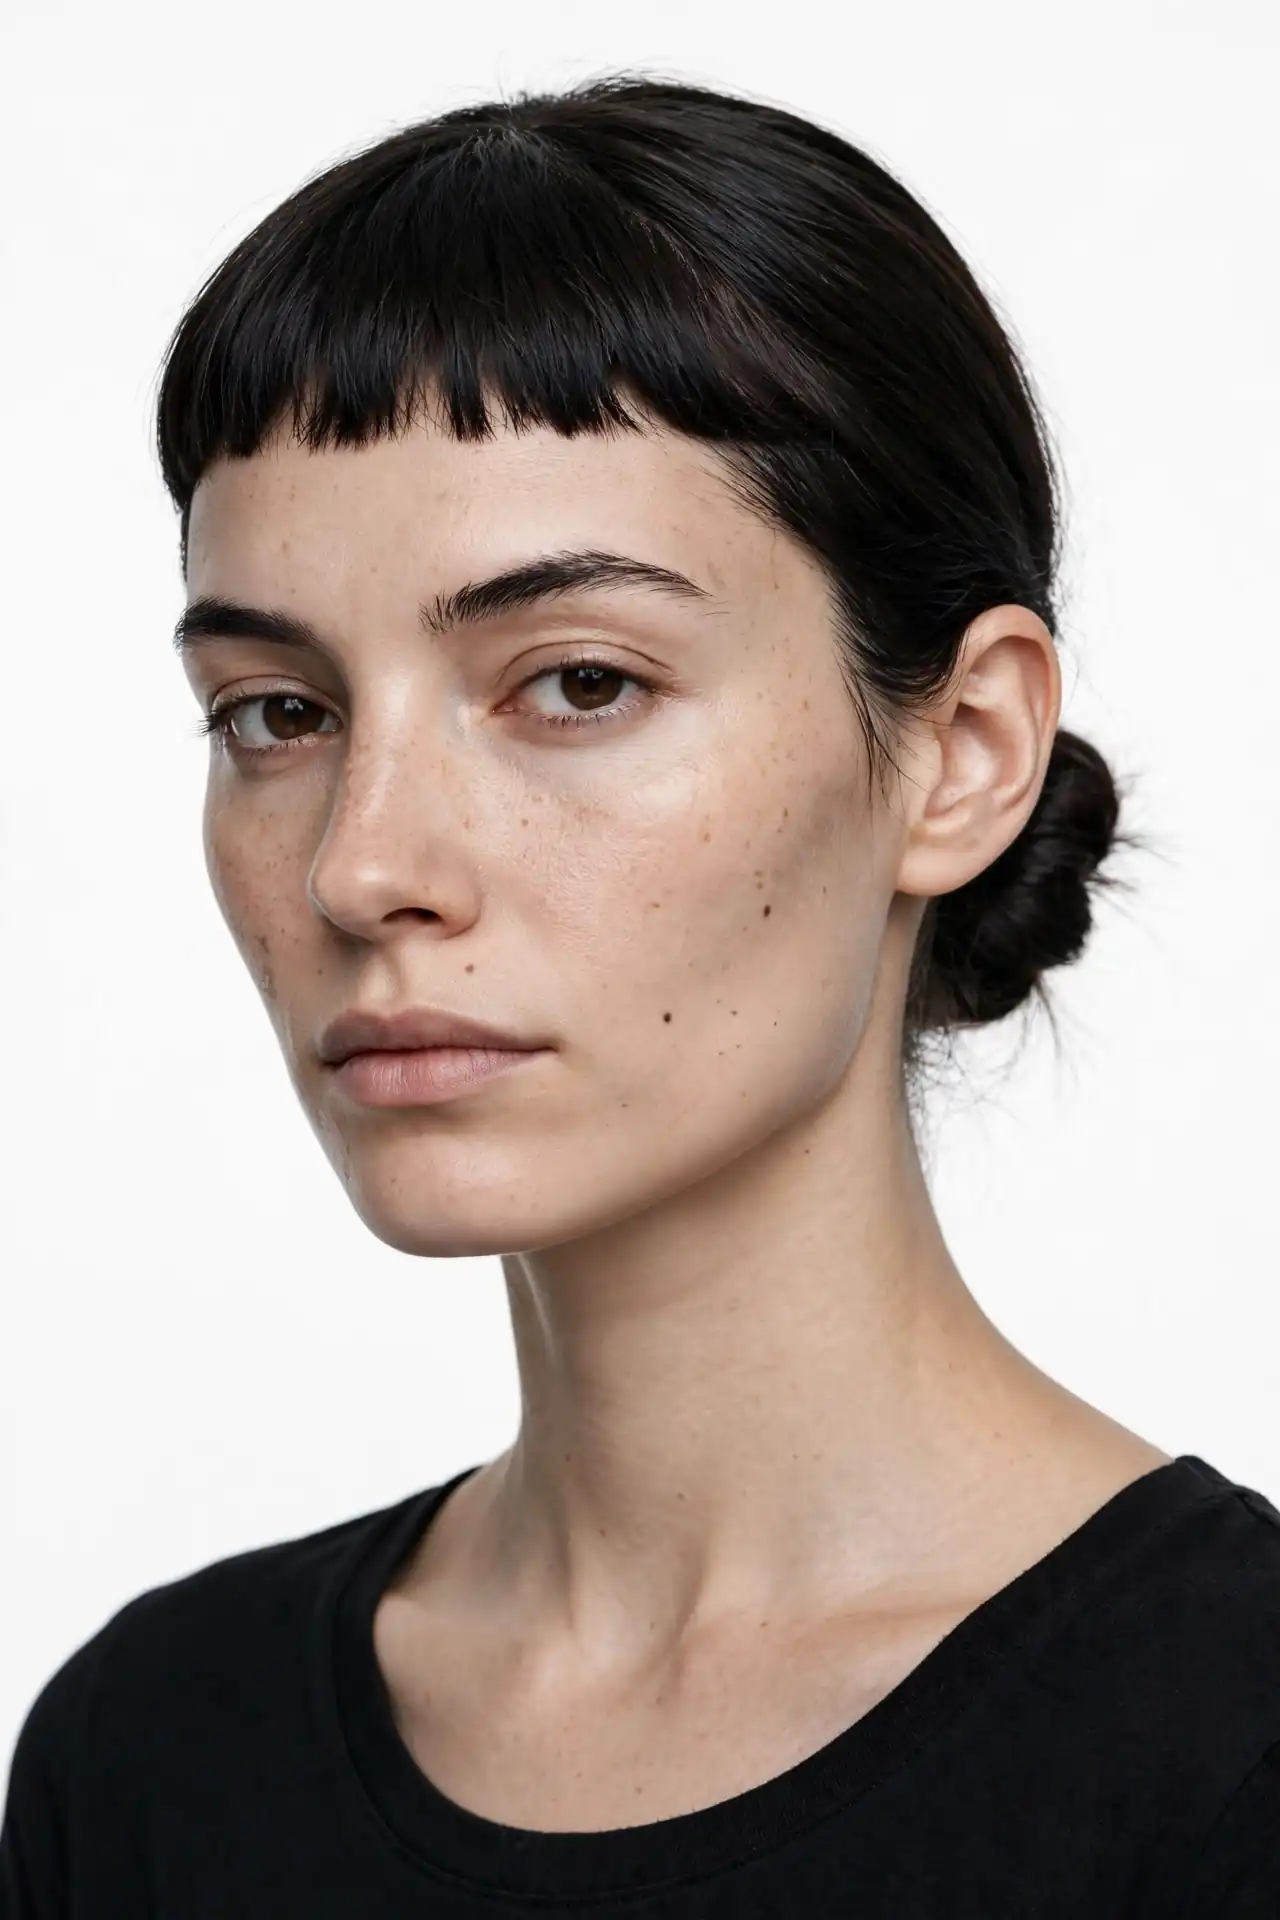
The Top Knot with Birkin Bangs
Long, softly separated bangs skimming the eyelashes, borrowed directly from Jane Birkin, and paired with a knot high on the crown. What makes this combination work is the inversion of normal proportions. Your fringe becomes the longest visible section of hair while everything else is gathered upward and out of sight. It reads effortless in a very specific seventies way, and it happens to be forgiving, since the length gives you room before a trim becomes urgent.
Style the fringe with a small round brush directed downward, then break it up slightly with your fingers so it separates rather than sitting as a solid curtain. A touch of dry shampoo at the roots mid-afternoon keeps it from going flat, which is the main problem with a fringe this long.
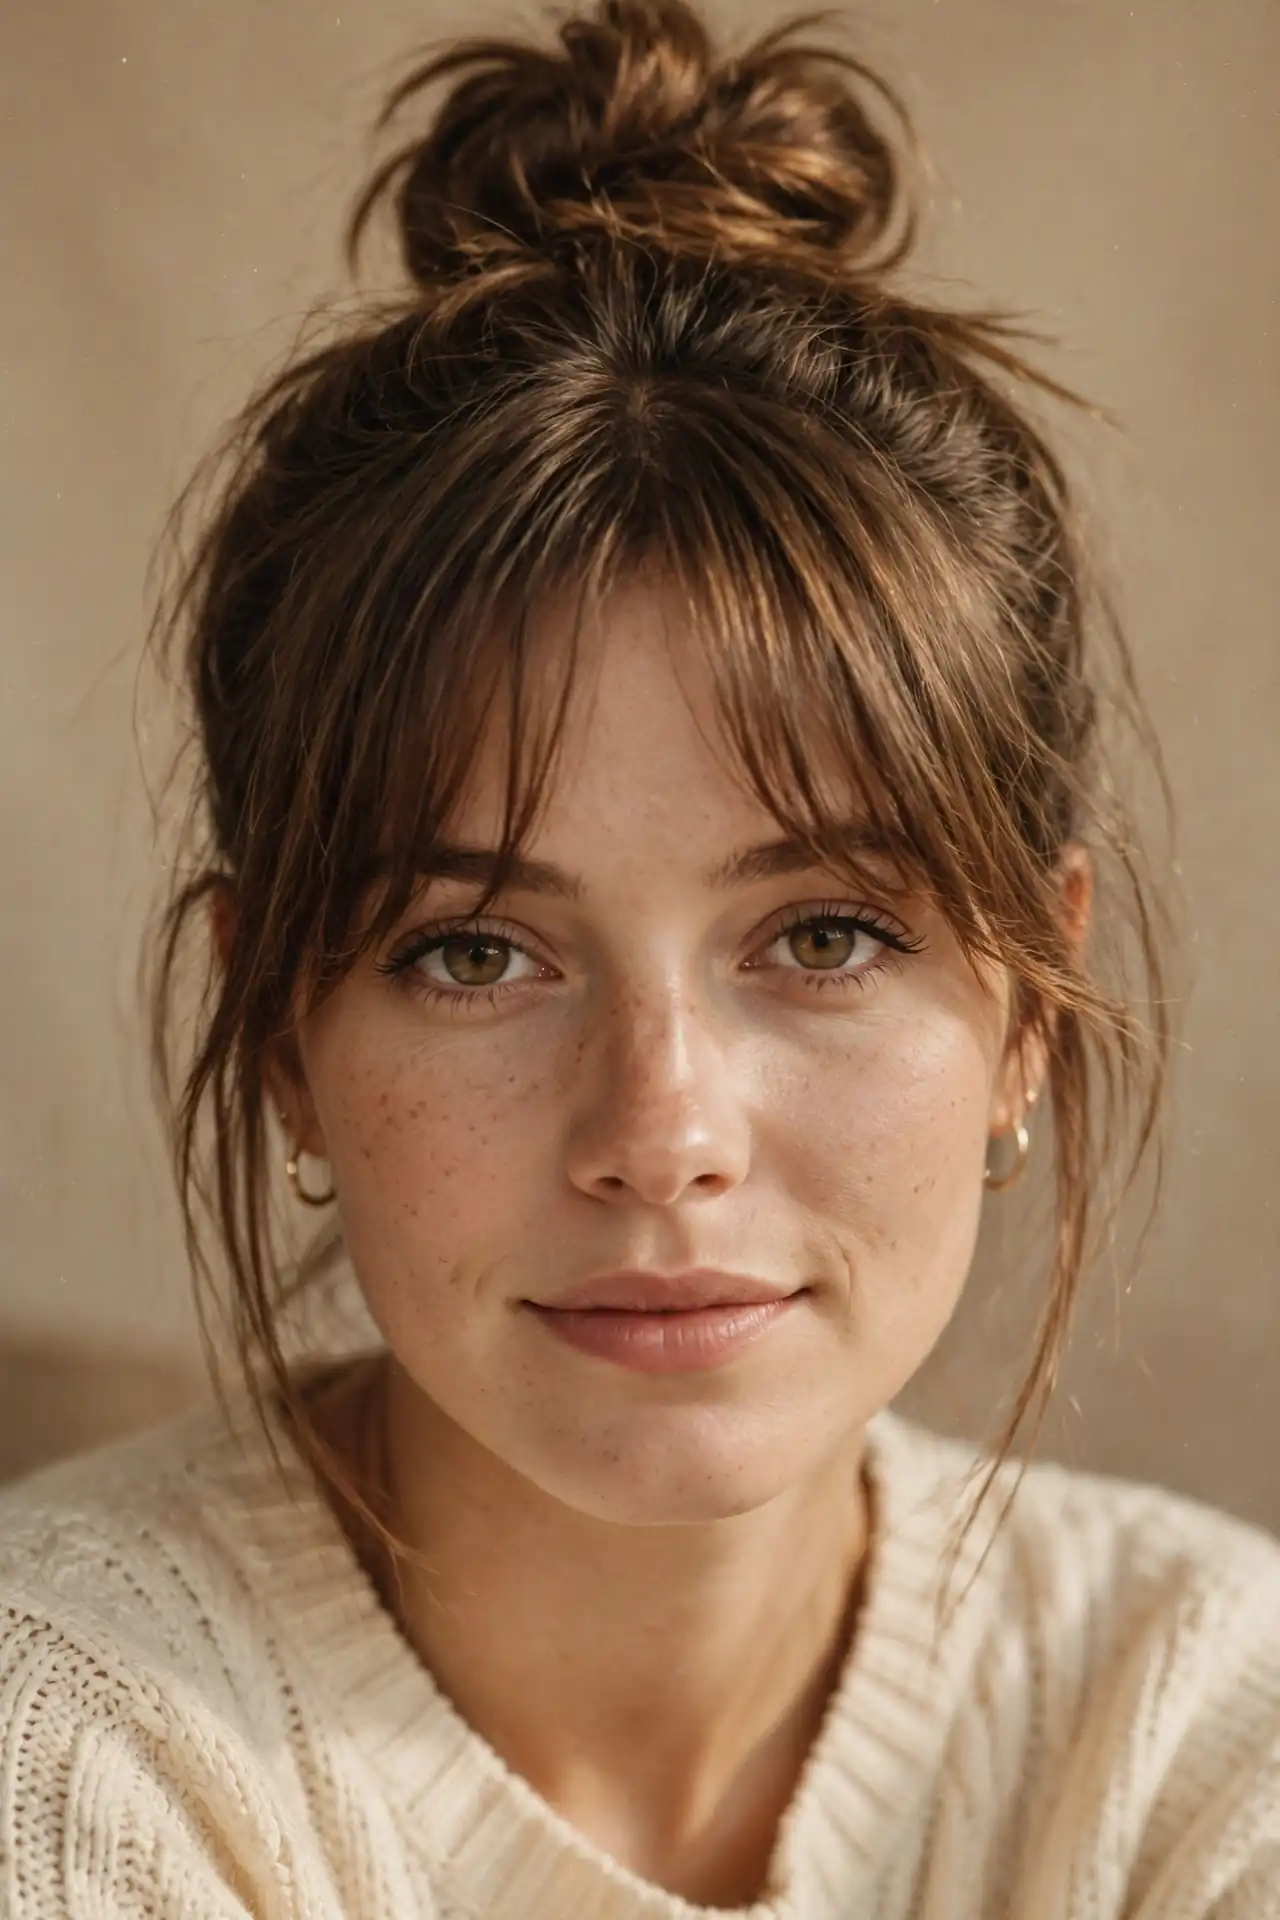
The Bun with an Arched Fringe
Cutting the fringe with a slight upward curve at the outer edges rather than straight across is a small technical difference that changes the whole result. The arch opens up the eye area and prevents the closed-in feeling that a heavy straight fringe can create above a pulled-back style. It’s particularly worth asking for if you’ve tried blunt bangs with an updo before and found the combination too heavy. Most stylists will know exactly what you mean if you ask for a soft arch or a rounded fringe line.
Because the shape is gentler, it pairs comfortably with almost any bun height, from a low chignon to a full top knot.
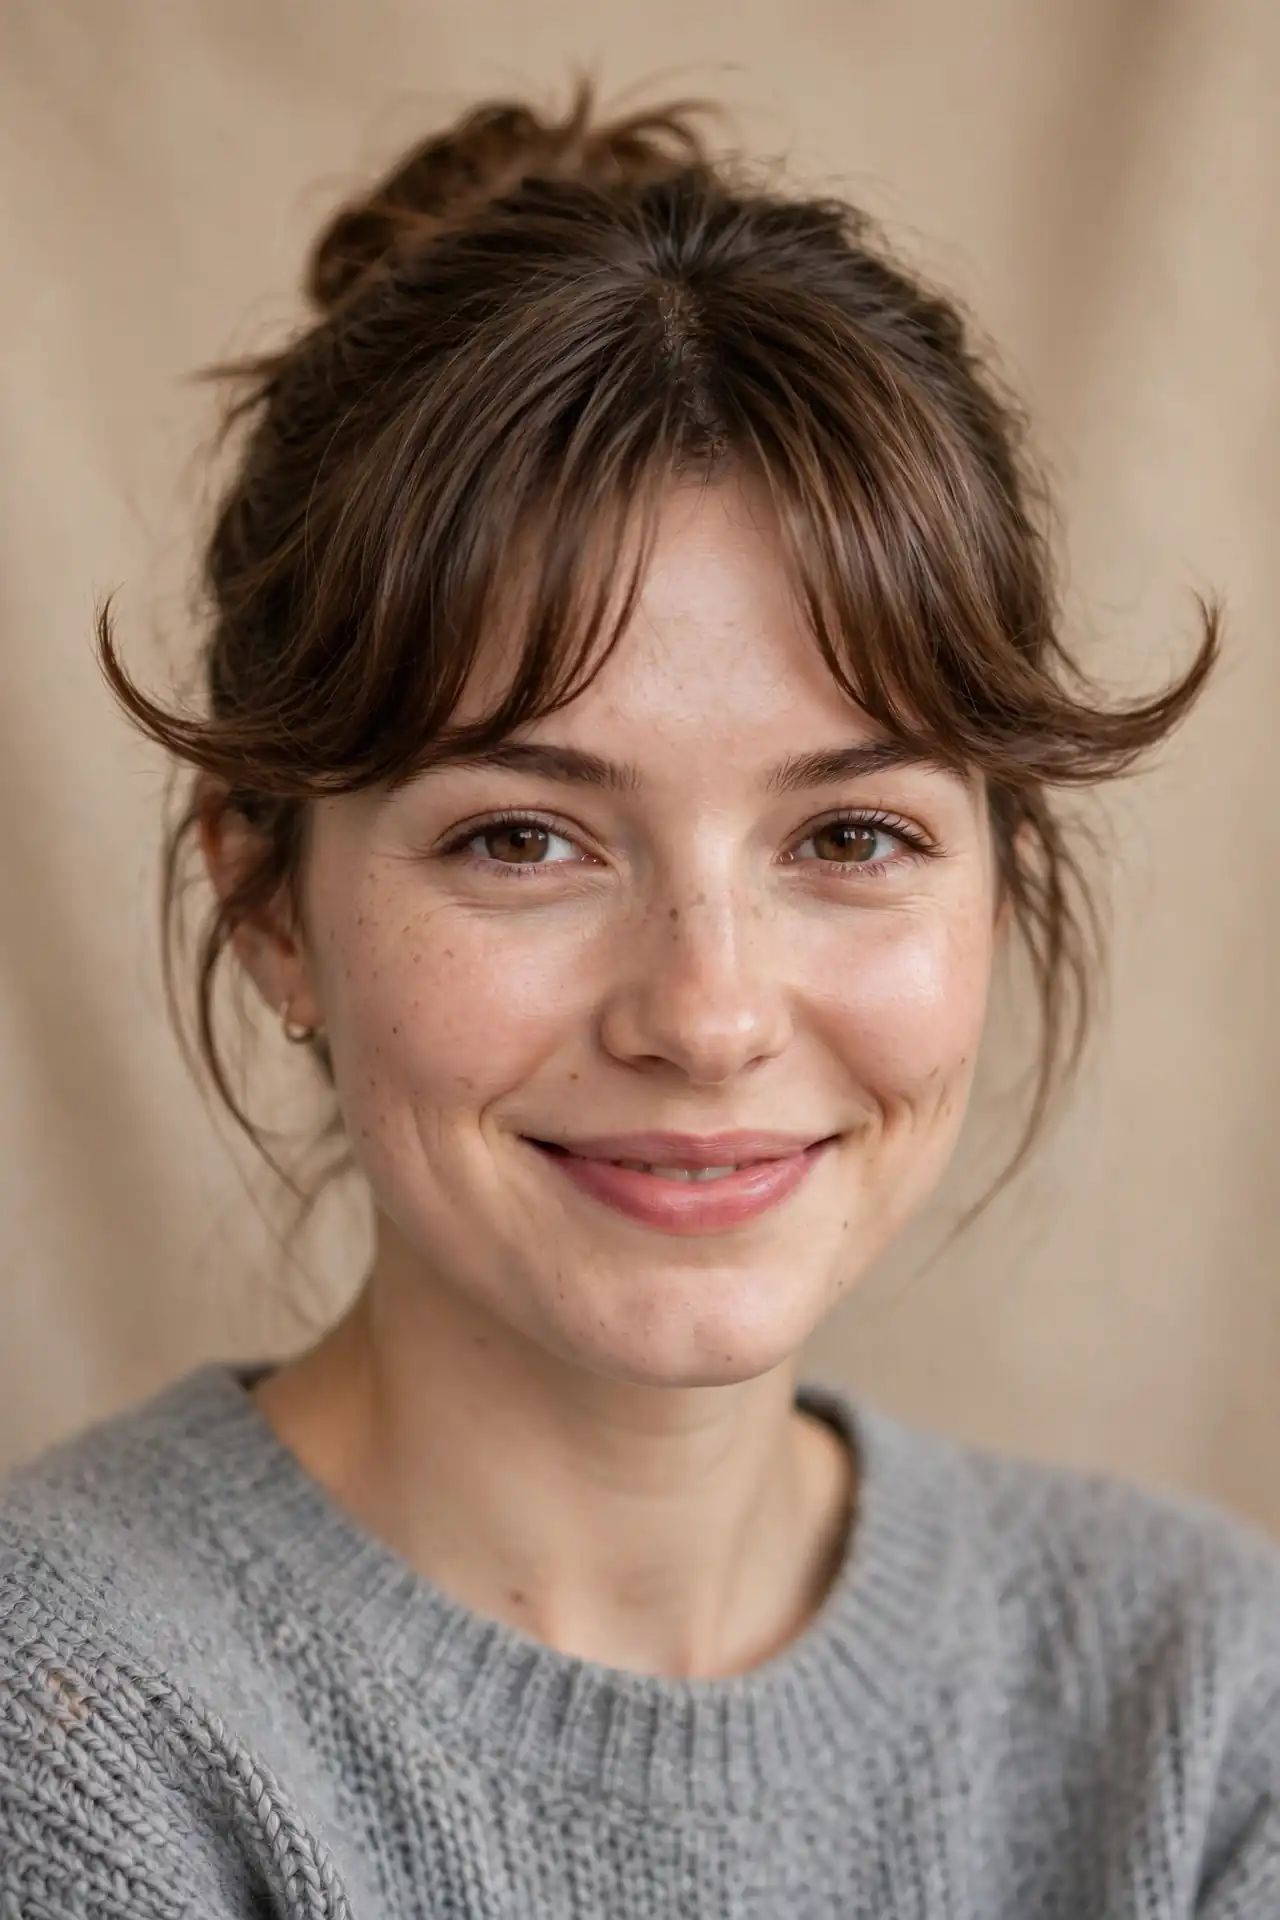
Texture-Specific and Occasion Versions
The Curly Bun with Curly Curtain Bangs
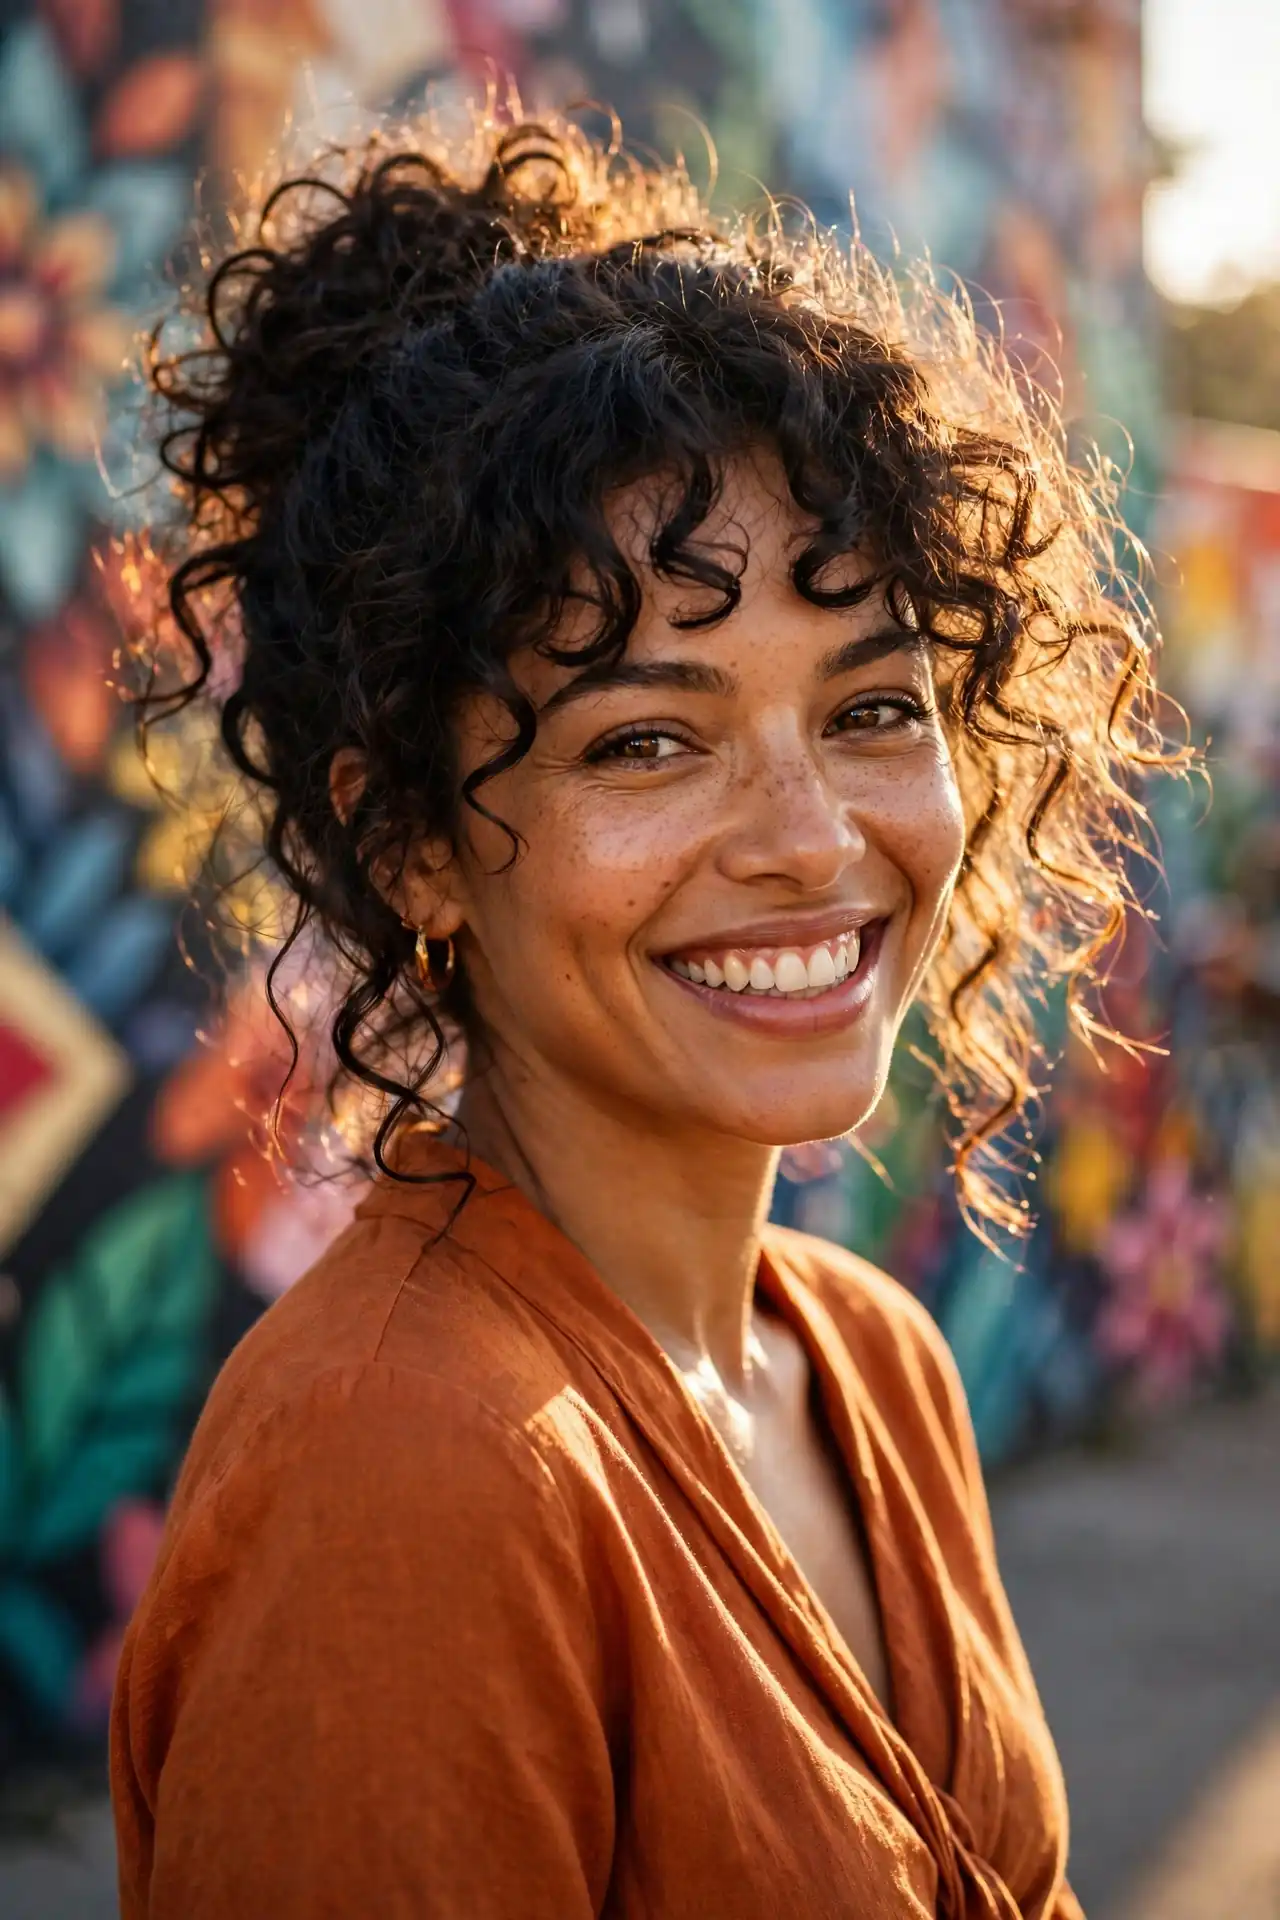
Curly curtain bangs add intent to a hairstyle, which is exactly what a messy curly bun needs to look like a choice rather than a compromise. The single most important rule here is that curly bangs must be cut dry. Curls shrink significantly as they dry, sometimes by half, and a fringe cut wet at your target length will finish far shorter than you asked for. Ask your stylist to shape it curl by curl rather than in a straight line, and to leave it longer than feels necessary.
For the bun itself, gather with your fingers rather than a brush, since brushing curls before gathering creates the frizz halo that ruins the whole look. A silk scrunchie protects the ponytail line where curly hair breaks most easily. Leave a few coils loose at the temples to soften everything.
The Coily High Puff with a Swoop Bang
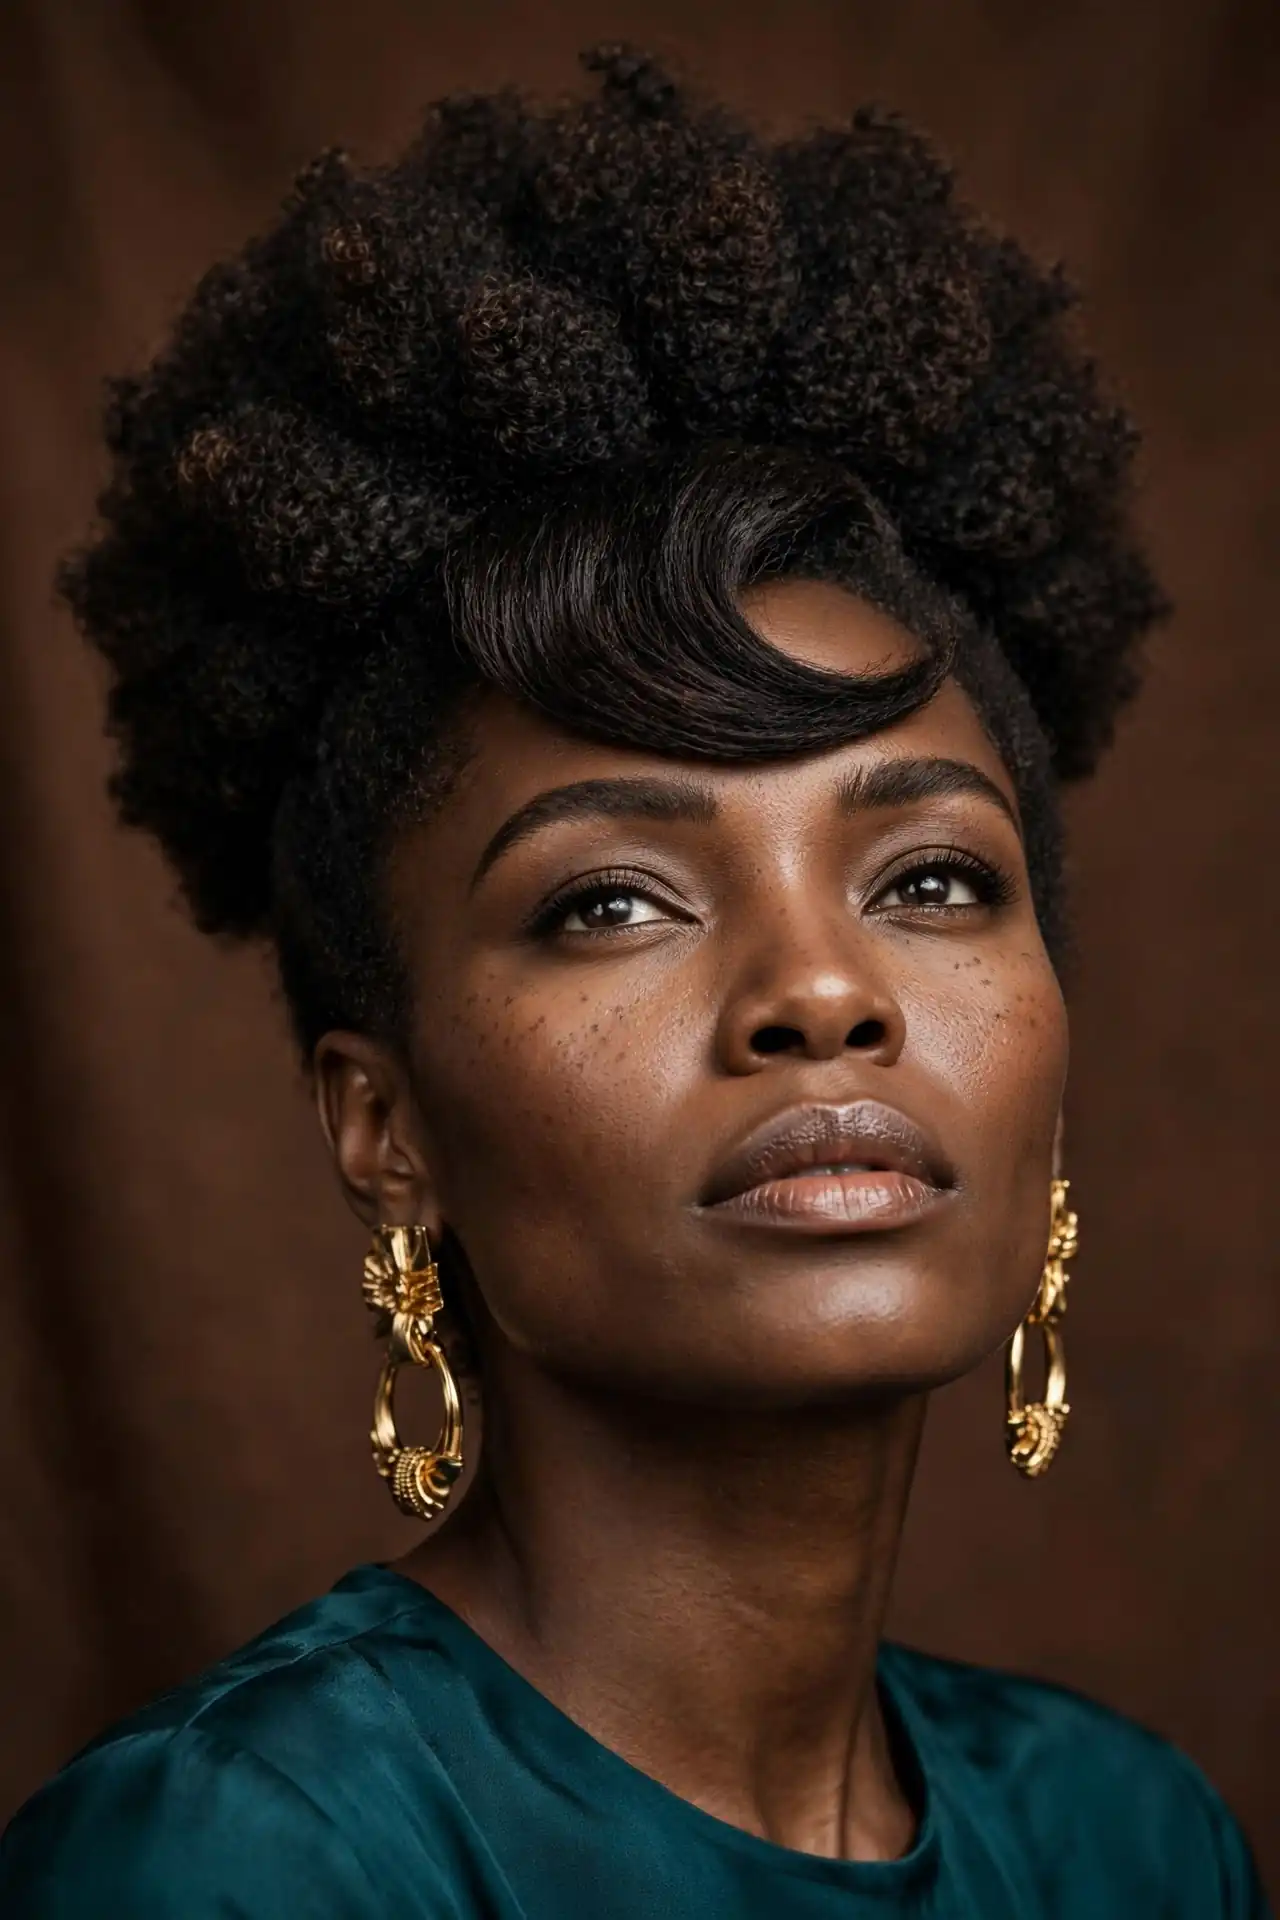
Type 4 texture creates a rounded, full puff shape naturally, with no teasing required, which is a genuine advantage most guides overlook. Smooth the sides with a soft brush and a light, alcohol-free edge control, then secure with a fabric-covered band rather than anything with metal. The swoop bang sits forward across the forehead, sculpted with gel or a light pomade and set with a scarf tied around the hairline for ten minutes while you finish getting ready. That short setting time makes the entire difference between sculpted and merely damp.
Avoid pulling tight at the temples. That area is where thinning shows first among anyone who wears pulled-back styles regularly, and a puff worn daily in the same position accumulates real tension over months.
The Bridal Low Bun with a Soft Fringe
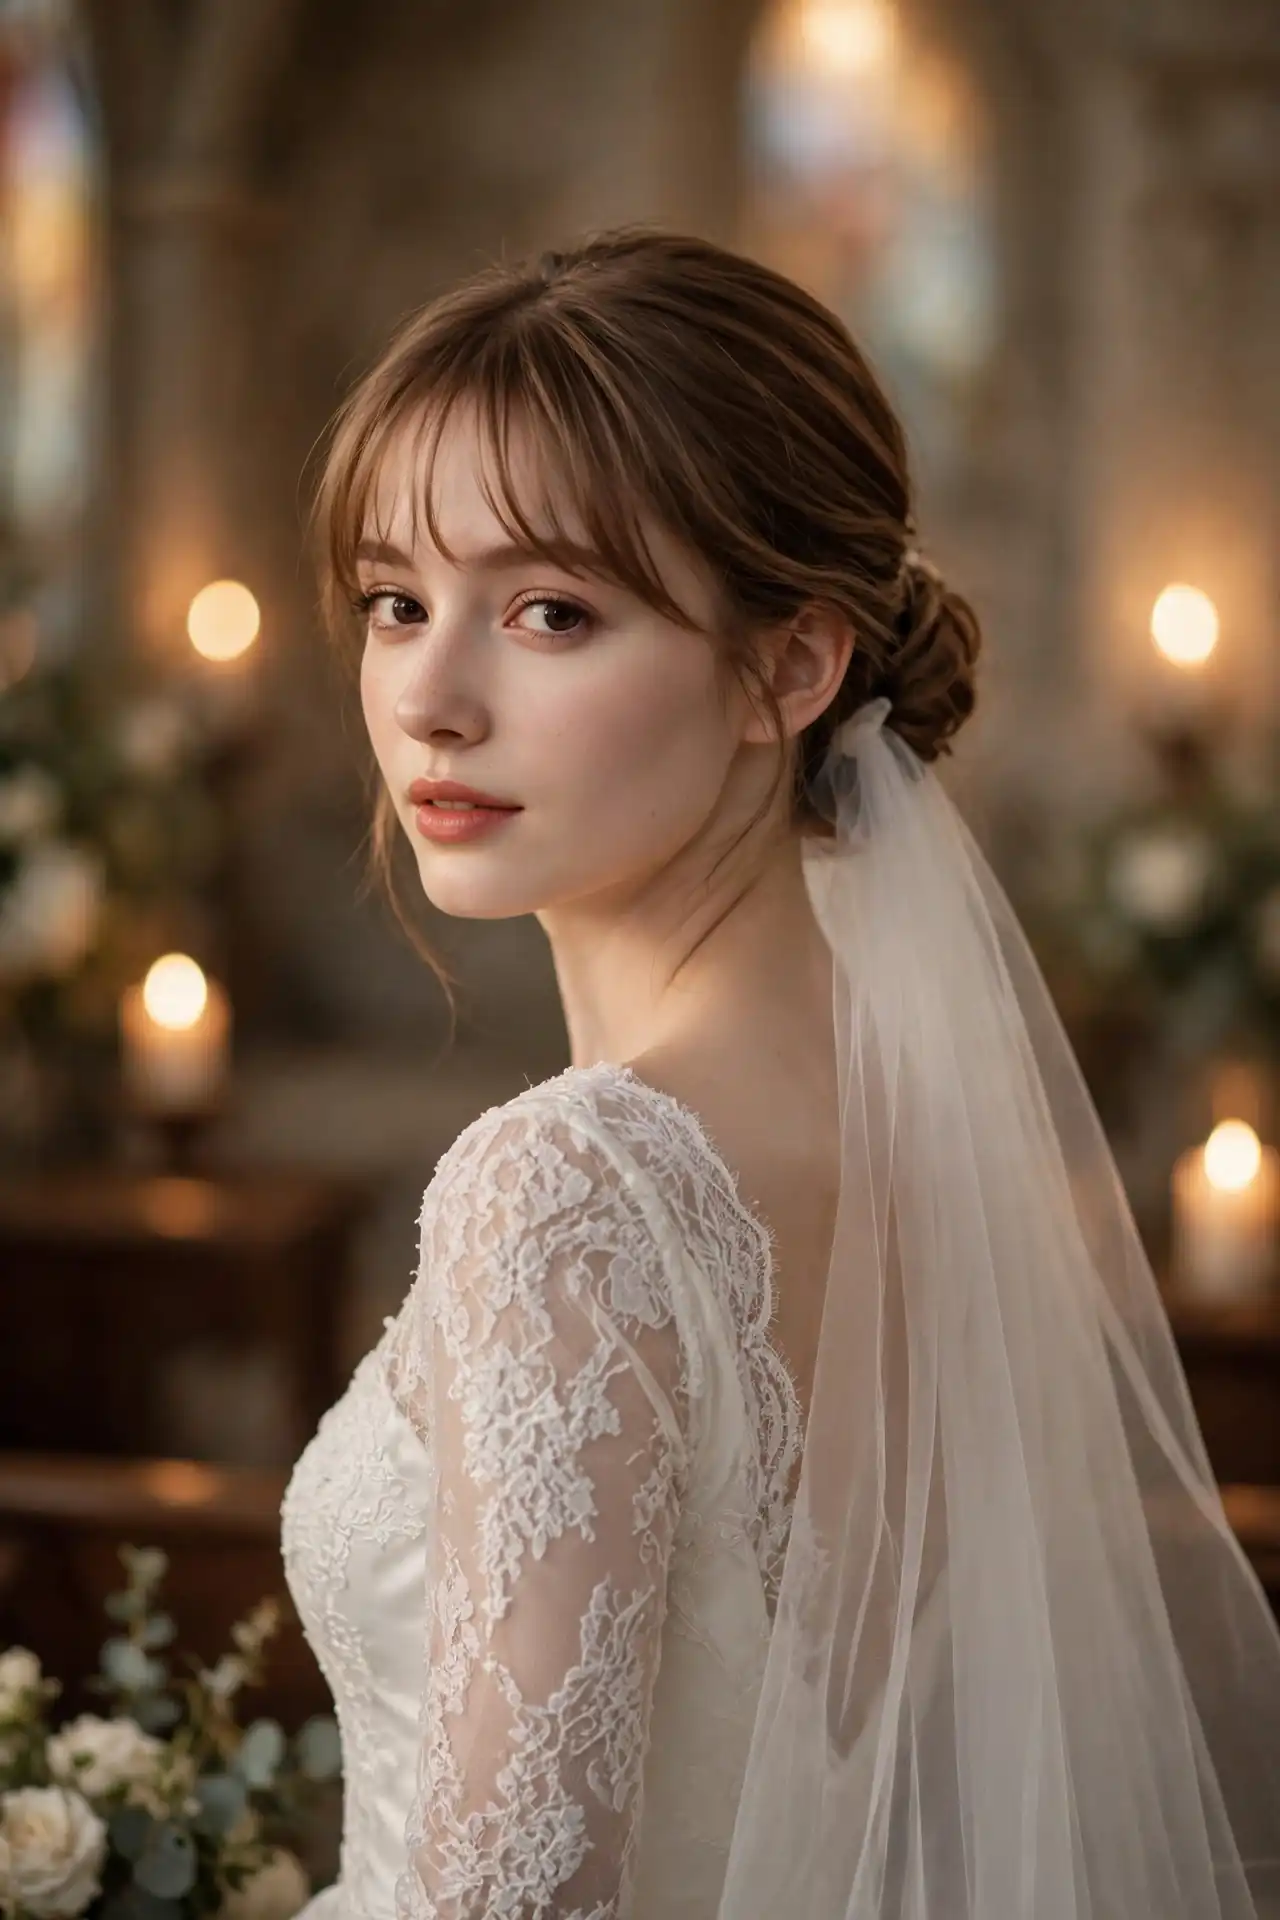
Bridal buns fail for one predictable reason: they’re styled for the ceremony rather than for fourteen hours. A soft fringe changes the calculation slightly, because it’s the one part of the style that can be refreshed easily on the day. Style it first, before anything else, and give a small round brush to whoever is carrying your touch-up kit. The veil comb should anchor underneath the bun rather than through it, which means the veil can come off at the reception without the whole style collapsing.
Book a trial and specifically ask for the fringe to be shaped with your veil in place. Bangs sit differently once a comb is pushed into the hair behind them, and discovering that on the morning is not the moment.
The Half-Up Bun with a Grown-Out Fringe
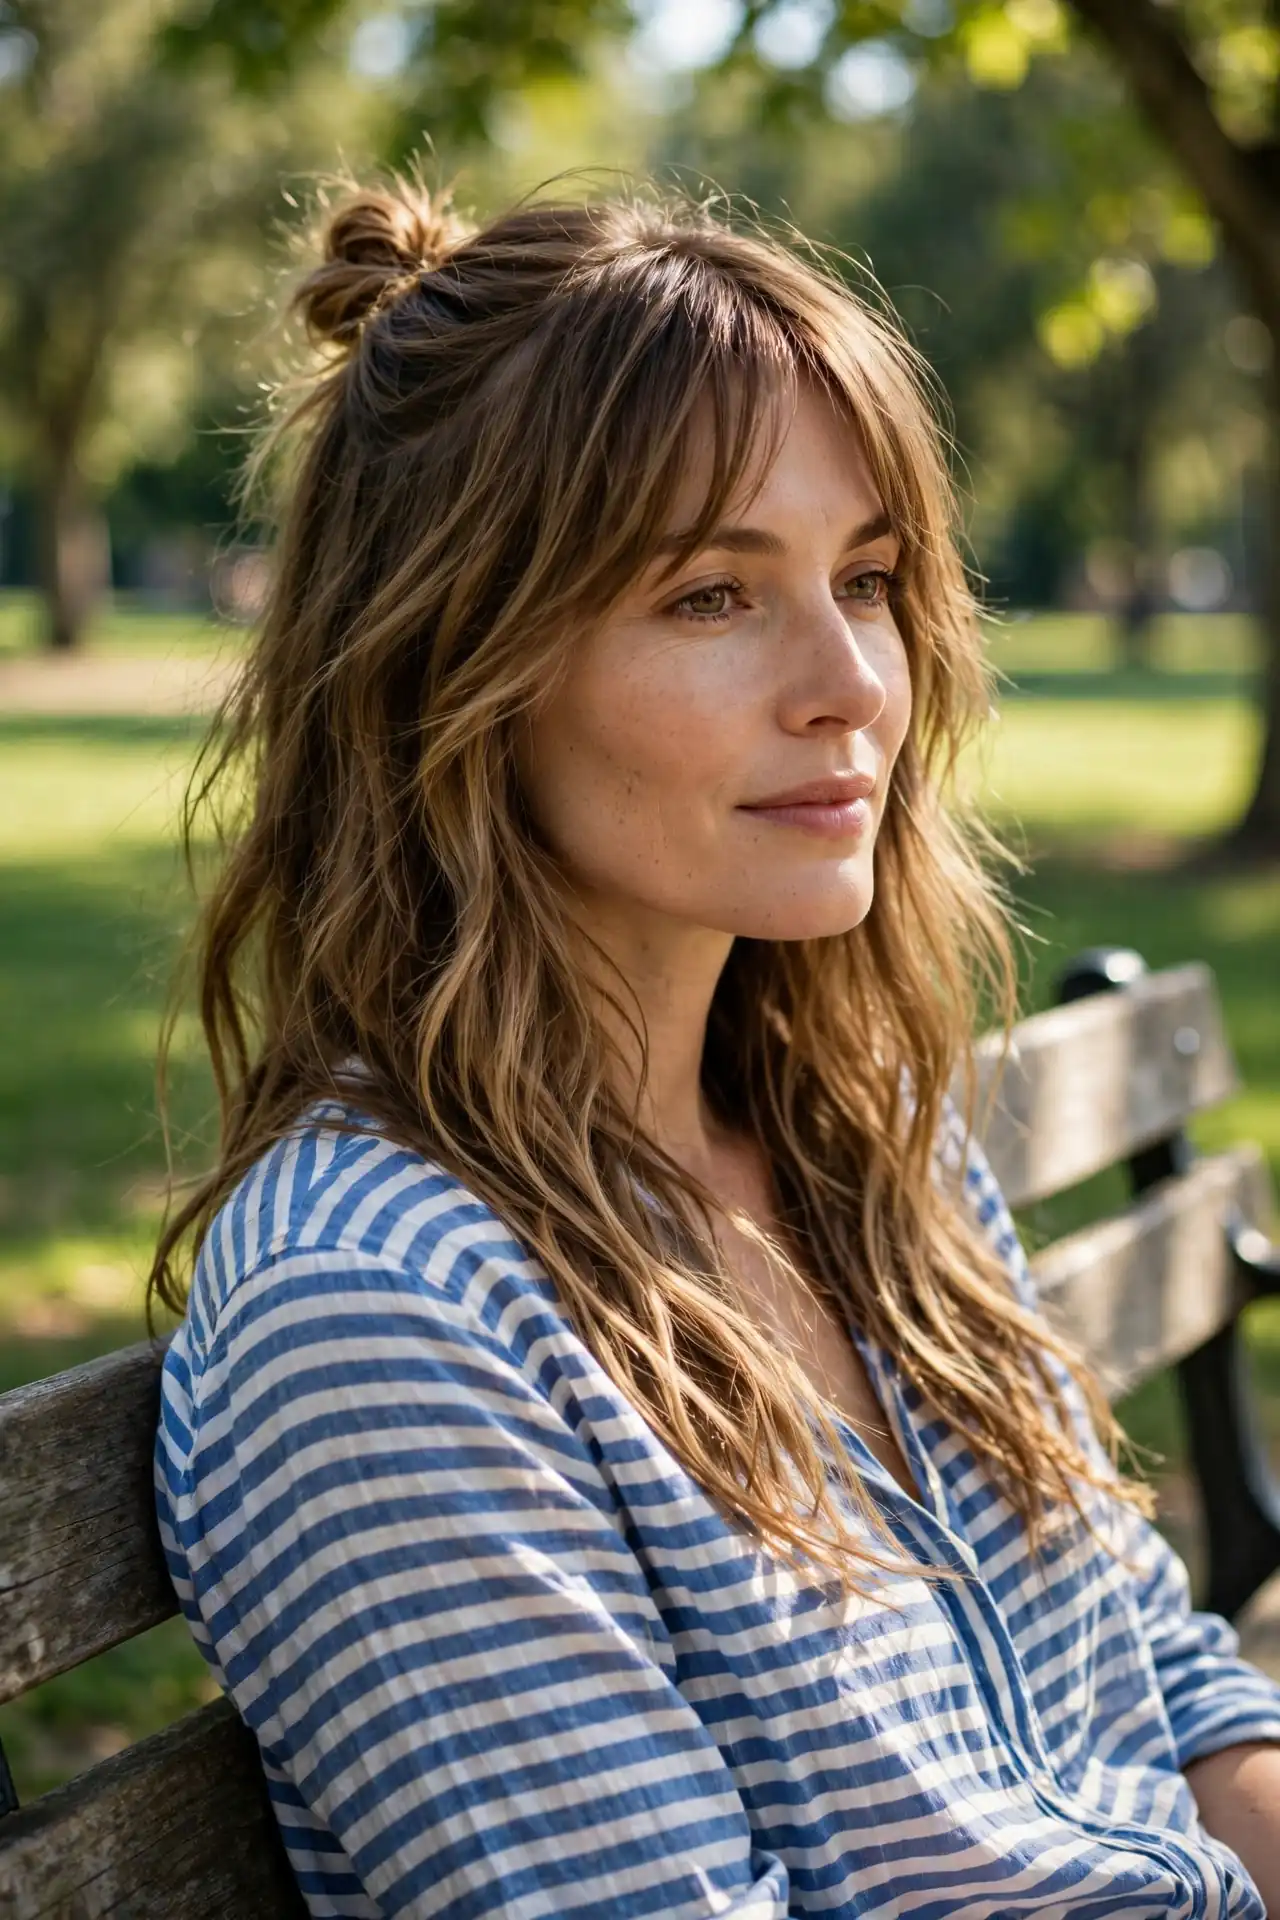
Growing out a fringe is usually an awkward waiting game. This combination turns that stage into an actual style. Gathering only the top section into a small knot while the rest falls loose gives you structure at the crown and movement everywhere else. The grown-out fringe pieces, now sitting somewhere between cheekbone and jaw, read as deliberate face-framing tendrils rather than bangs that have outstayed their welcome.
It’s also the gentlest option here for your scalp, since only part of the hair carries any tension. Second-day hair works better than clean, and the whole thing takes about ninety seconds. This is the style to keep in your back pocket for the three months between deciding to grow out your fringe and it finally blending into your layers.
What Nobody Tells You About Wearing Bangs with an Updo
Most roundups show finished photos. These are the mechanics that decide whether the combination works on your head at 4pm rather than in a studio.
Style the Fringe First, Always
Your fringe sets into whatever shape it dries in, and correcting it after your hair is already gathered almost never works.
Dry and shape the bangs before you touch anything else, while the rest of your hair is still damp or unstyled. Use a small round brush, roughly one to two inches, directing the airflow downward from above rather than from underneath. Blowing upward at a fringe is what creates the lift and separation people blame on cowlicks. Finish with a short blast of cool air to lock the shape.
Once the fringe is set, gather the rest. Doing it in the reverse order is the single most common reason bun-and-bangs attempts look wrong.
Tension at the Hairline Fights Your Fringe
Pulling everything back tightly also pulls on the roots at the front of your head, which lifts short bangs and makes them separate into pieces.
The fix is small and effective: leave deliberate slack at the front before you secure the elastic. Gather looser through the first few inches behind your fringe, then tighten from the mid-crown backward. On a high bun this matters more than on a low one, because the upward angle applies more pull to the hairline.
This is also worth mentioning for a different reason. Wearing tight updos in the same position daily contributes to traction alopecia, which shows first as thinning at the temples and along the hairline. Vary the height and position across the week, use fabric-covered elastics, and let your hair down in the evenings.
Product Shielding
Whatever you spray on the bun will drift forward onto your fringe.
Gel and hairspray residue on bangs produces exactly the stringy, separated look you were trying to avoid, and it happens within an hour. Hold a comb, a piece of card or simply your flat hand along the hairline as a shield while you spray the back. It takes two seconds and it saves the whole style.
More broadly, your fringe and the rest of your hair need opposite products. Smoothing cream, gel and strong-hold spray belong on the bun. The fringe needs almost nothing, with maybe a touch of dry shampoo at the roots if it starts falling flat by afternoon. Forehead oils are why bangs go greasy faster than the rest of your hair, which is worth understanding rather than blaming your shampoo.
Matching the Fringe to the Bun Height
| Fringe Type | Best Bun Pairing | Why It Works |
|---|---|---|
| Curtain bangs | Low bun, messy bun, top knot | Falls naturally either side, no adjustment needed |
| Wispy see-through | Ballerina bun, undone chignon | Softens tight structure without adding weight |
| Blunt brow-skimming | High bun, slicked low bun | Two strong graphic elements in contrast |
| Baby or micro bangs | Low bun, rope twist bun | Minimal bun lets the fringe dominate |
| Side-swept | Middle-part bun, twisted low bun | Diagonal breaks the symmetry of a pulled-back shape |
| Birkin or long bangs | Top knot, half-up bun | Inverts proportion, fringe becomes the longest piece |
| Grown-out fringe | Half-up bun, claw clip bun | Reads as face-framing tendrils rather than bangs |
Troubleshooting the Combination
| Problem | Likely Cause | Fix |
|---|---|---|
| Fringe lifts and separates | Too much tension at the hairline | Leave slack at the front before securing |
| Bangs look greasy by midday | Product drift, or forehead oils | Shield while spraying, dry shampoo at the roots |
| Bun slides down through the day | Hair too clean and slippery | Style on day-two hair or add texture spray |
| Fringe sits flat and lifeless | Dried without a round brush | Dry the fringe first, brush downward, cool shot |
| Style looks severe despite bangs | Fringe too thin for the bun’s structure | Denser fringe, or loosen the bun |
| Short bangs won’t stay down | Cowlick fighting the direction | Cut longer for weight, or switch to side-swept |
The Trim Schedule Is the Real Cost
The bun costs nothing to maintain. The fringe is a different matter entirely.
Expect a trim every two to four weeks depending on the type. Micro and baby bangs need fortnightly attention, blunt fringes every two to three weeks, and curtain or long bangs stretch comfortably to five or six. That’s the number most people fail to budget for, in time as much as money, and it’s the reason bangs get abandoned more often than any other haircut decision.
Many salons offer free or discounted fringe trims between full appointments, so ask when you book. If the schedule feels unrealistic, choose curtain bangs specifically. They grow out into face-framing layers with no awkward mullet stage, which means neglecting them still looks intentional.
Final Thoughts
Bun with bangs hairstyles work because the two halves solve each other’s weaknesses. A bun on its own can read cold and severe, pulling every line of your face backward. Bangs on their own leave you managing loose hair all day. Together you get a shape that stays out of your way while your face keeps a soft frame, and that combination scales from a rushed Tuesday morning to a wedding without changing the fundamental technique.
Style your fringe before you gather anything, every single time. Leave slack at the front so tension doesn’t lift your bangs. Shield the hairline when you spray. Choose your fringe type based on the trim schedule you’ll actually keep rather than the photo you liked most, since that decision is what determines whether you’re still wearing this in three months.
Save the combinations that stopped your scroll and try one tomorrow morning. Most of them take less time than deciding which to try.
Frequently Asked Questions
Do bangs work with an updo?
Exceptionally well. When hair is pinned into a bun or chignon, the bangs remain forward to frame the face, which adds softness to what could otherwise look severe. Curtain bangs are the easiest pairing since they already fall naturally either side of the face.
Why do my bangs lift up when I put my hair in a bun?
Tension at the hairline. Pulling everything back tightly also pulls on the roots behind your fringe, which lifts short bangs and separates them. Gather looser through the first few inches behind the fringe, then tighten from the mid-crown backward.
Should I style my bangs before or after making the bun?
Before, always. A fringe sets into whatever shape it dries in, and fixing it once your hair is gathered rarely works. Dry and shape the bangs first with a small round brush directed downward, then finish with cool air before gathering the rest.
Which bangs need the least maintenance with a bun?
Curtain bangs and long Birkin-style fringes. Both stretch to five or six weeks between trims and grow out into face-framing layers without an awkward stage. Micro and baby bangs sit at the other extreme, needing a trim roughly every two weeks.